These setup instructions provide information for configuring SAML-based sign-in through Okta for all users in the organization to the eSHARE application. The Entity ID and ACS URL referenced in this document will be provided to you by eSHARE’s Customer Success team when the tenant for your organization is provisioned on the eSHARE platform. The following steps will be reviewed:
Create the SAML Application
Log in to your Okta instance admin portal, typically https://<tenant_name>-admin.okta.com/.
In the left navigation pane, expand the 'Applications' section and select 'Applications' from the menu.
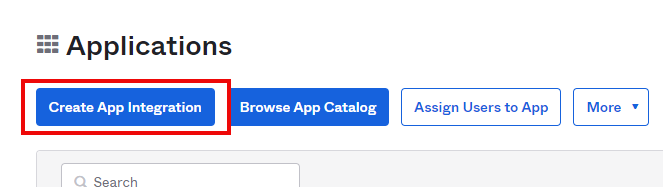
Click the 'Create App Integration' button.
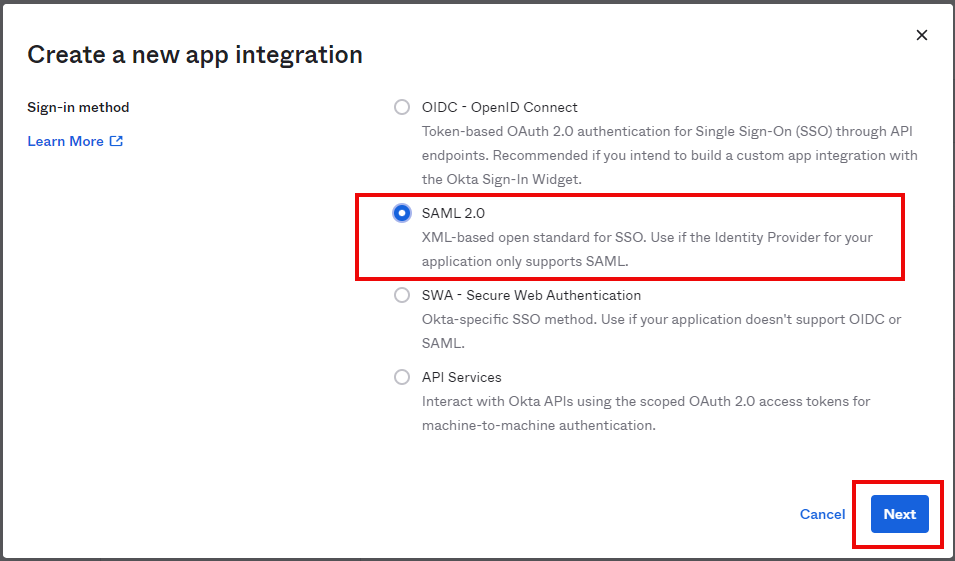
In the 'Create a new app integration' pop-up window, select 'SAML 2.0' and click 'Next'.
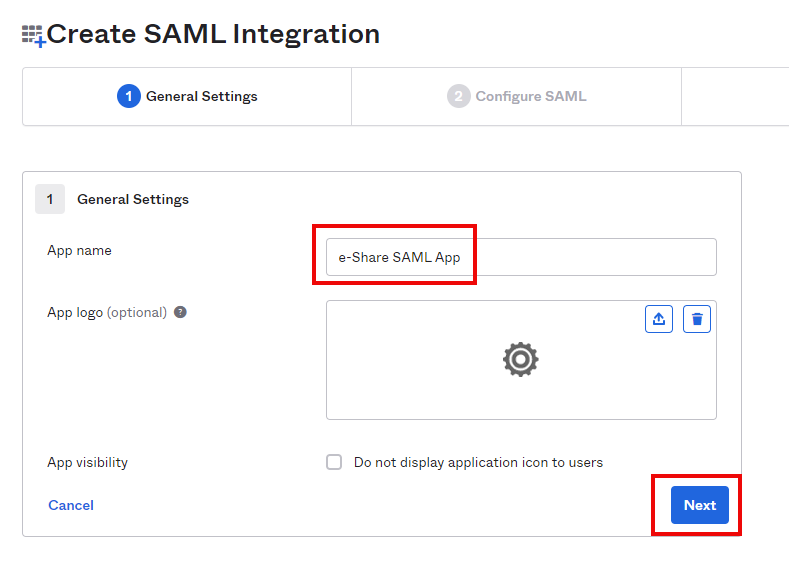
On the 'Create SAML Integration' page, under the 'General Settings' tab, enter the name of the app (e.g., eShare SAML App) and select 'Next'.
Configure SAML Settings
Within the 'Configure SAML' tab of the same page, for 'Single sign on URL', enter the ACS URL provided by eSHARE.
For 'Audience URI (Entity ID)', enter the Entity ID provided by eSHARE.
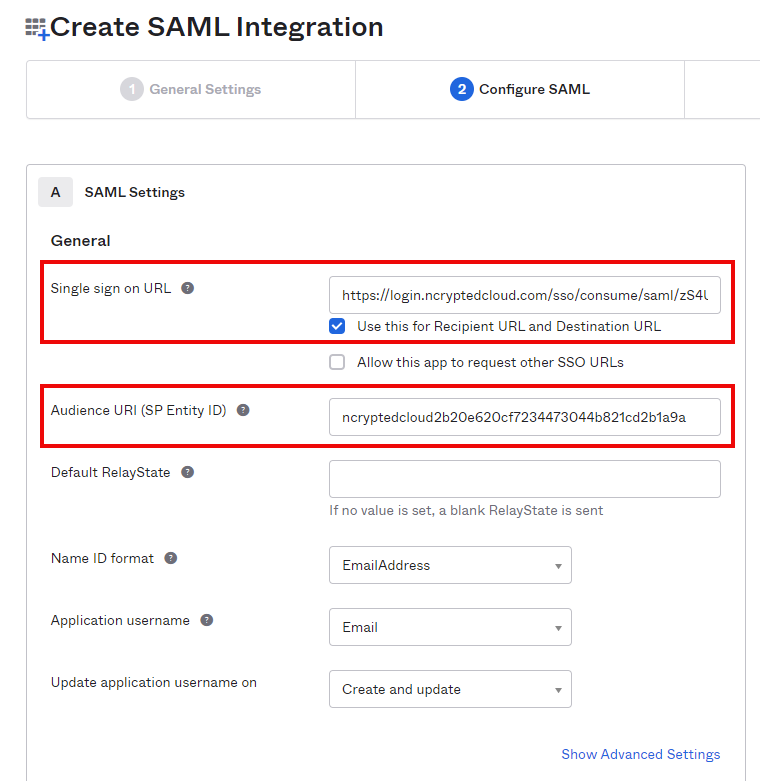
Verify 'Use this for Recipient URL and Destination URL' is selected, as shown in the screenshot.
Verify the following values are selected:
'Name ID format': EmailAddress
'Application username': Email
'Update application username on': Create and update
Map User Attributes
Scroll down to the 'Attributes Statements (optional)' section.
In the displayed statement, enter the following:
'Name': firstname
'Name format': Unspecified (default value, leave unchanged)
'Value': from the drop-down list, select user.firstName
Select the 'Add Another' button.
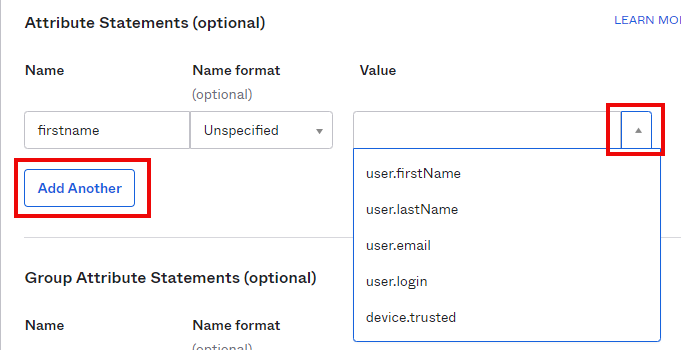
Repeat steps 2–3 above to add the following statements:
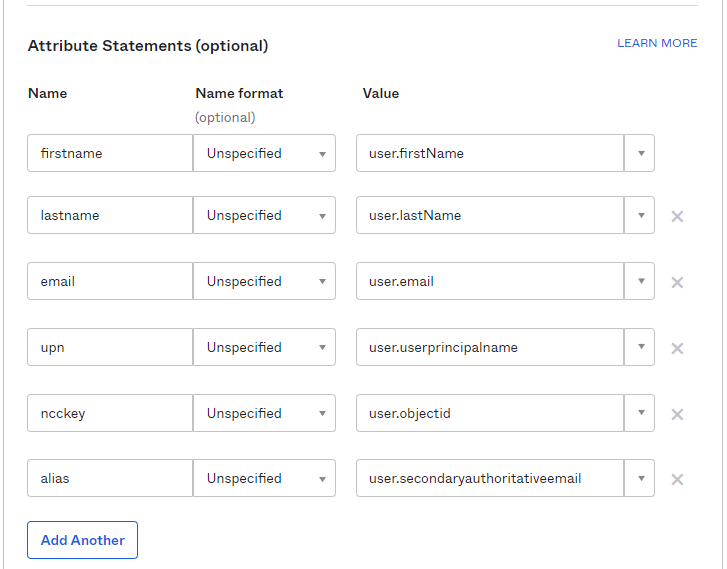
Name: lastname; value: user.lastName
Name: email; value: user.email
Name: upn; value: user.principalname
Name: ncckey; value: user.objectId
Name: alias; value: user.secondaryauthoritativeemail
Note:
The 'user.objectId' attribute value and 'alias' attribute value mappings may differ depending on which attributes are synced to Okta. Ensure the value mapping selected for 'ncckey' is any unique and immutable attribute of the user object, and the value mapping for 'alias' contains any alternative email addresses for the user.
A sample of a completed 'Attributes' section is shown below:
Scroll down and click 'Next'.
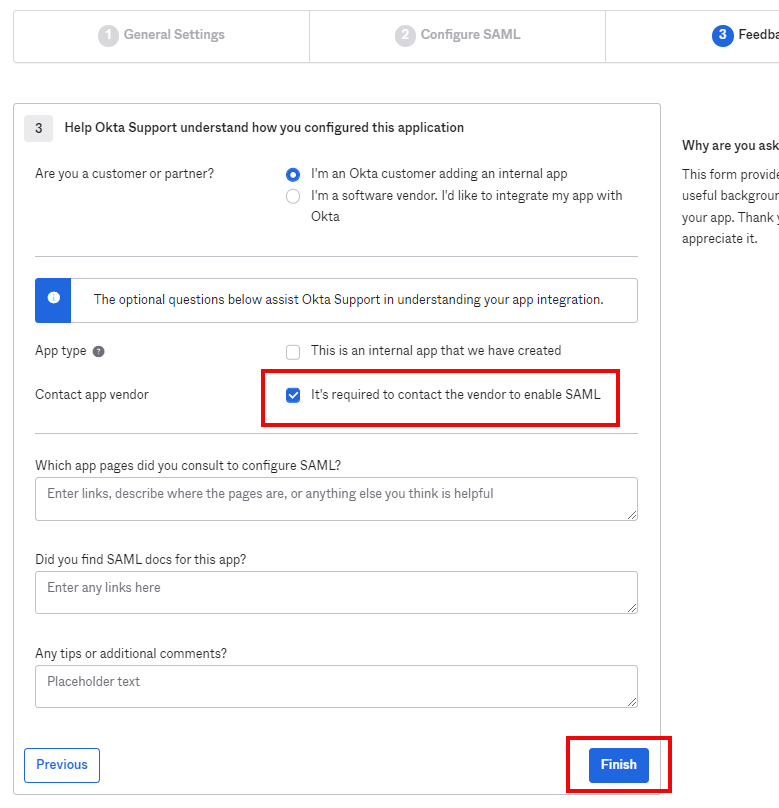
In the 'Feedback' tab, select the 'I am an Okta customer adding an internal app' and 'It’s required to contact the vendor to enable SAML' options.
When done, click 'Finish'.
Send the IdP Details to eSHARE
The Setting tab is displayed. Select the 'View Setup Instructions' button to view details.
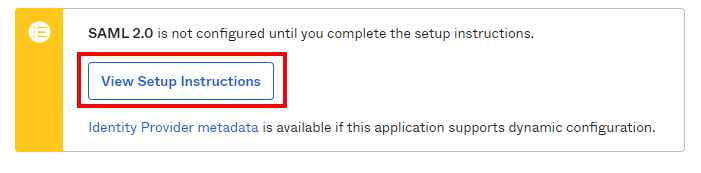
A new browser tab opens in Okta to 'How to Configure SAML 2.0 for eShare SAML Application'. Copy and send the following to your eSHARE Customer Success Manager:
Identity Provider Single Sign-On URL
X.509 Certificate
Alternatively, scroll down to the 'Optional' section, copy the entire content (XML) and send it to your eSHARE Customer Success Manager.
Assign Users to the Application
Switch to the 'eShare SAML App' browser tab in the Okta Admin Console and navigate to the 'Assignments' tab for the newly configured app.
Add users and/or groups to whom the application should be assigned.
Configure Group Based Entitlement
In situations where only a subset of the users authenticated to the eSHARE application should have the ability to share files/folders from their cloud storage service (e.g., OneDrive, Dropbox, etc.), it is necessary for Okta to include the Group information of such users.
If users are members of the designated Group, the SAML statement sent by Okta to eSHARE during the user’s login would include the Group attribute. This allows eSHARE to consume the Group attribute and enable the cloud storage service. If the Group attribute is not available for the user (because the user is not a member of the Group), such users would be able to access eSHARE but will only be able to access Trusted Shares received by them.
To configure Okta to include the Group attribute in the SAML statement:
Log in to the Okta Admin Console.
Go to 'Applications' > 'Applications' > 'eShare SAML App' (as configured above).
Select the 'General' tab, then the 'Edit' button under the 'SAML Settings' section.
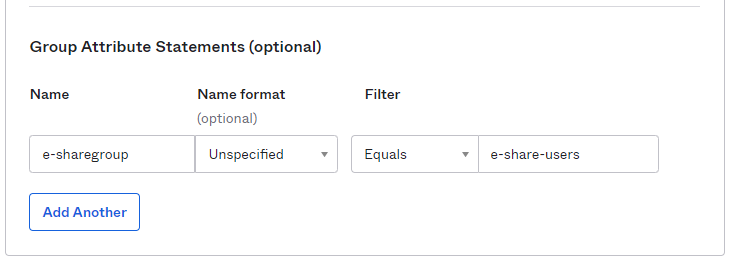
Within the 'Group Attribute Statements (optional)' section, enter any name for 'Name'.
For 'Filter', select 'Equals' and enter the name of the target Group. Members of this group would be provisioned with Cloud Provider in the eSHARE application.
Select 'Next' to save the changes.