This document describes how to create an External Link from the eSHARE Web Portal — a shareable link you can generate without naming recipients up front. The following steps will be reviewed:
PREREQUISITES:
This guide is only suitable for eSHARE licensed users. External/guest users may not see a 'Cloud Provider' tab.
Start an External Link
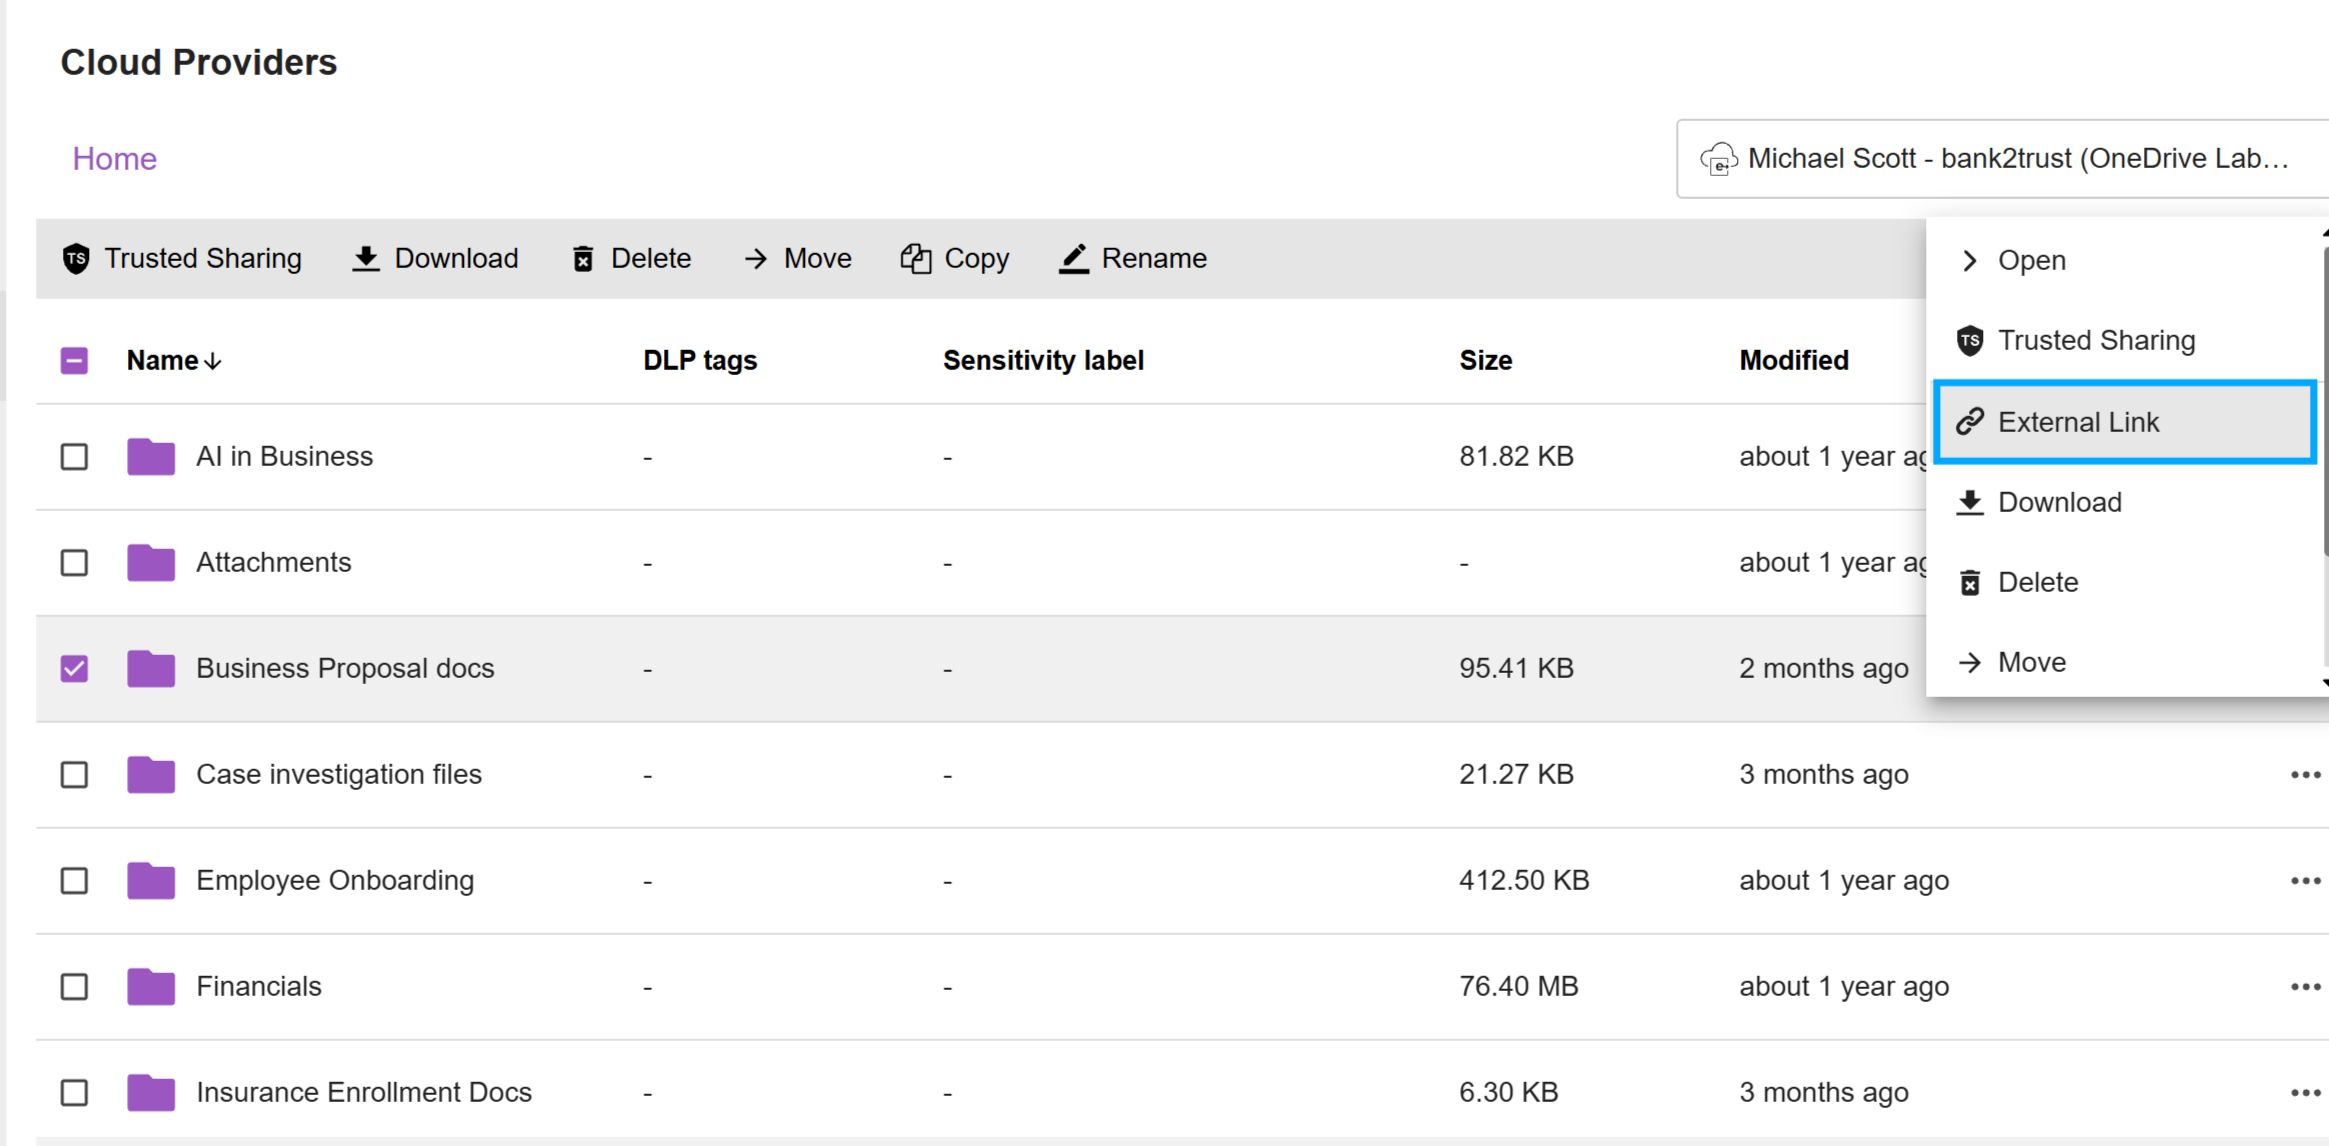
Log in to the eSHARE Web Portal and navigate to the 'Cloud Provider' tab.
Choose the file or folder you want to share by clicking the checkbox on the left, or click the '•••' menu beside it.
From the menu, select 'External Link'.
Enter the Link Details (Optional)
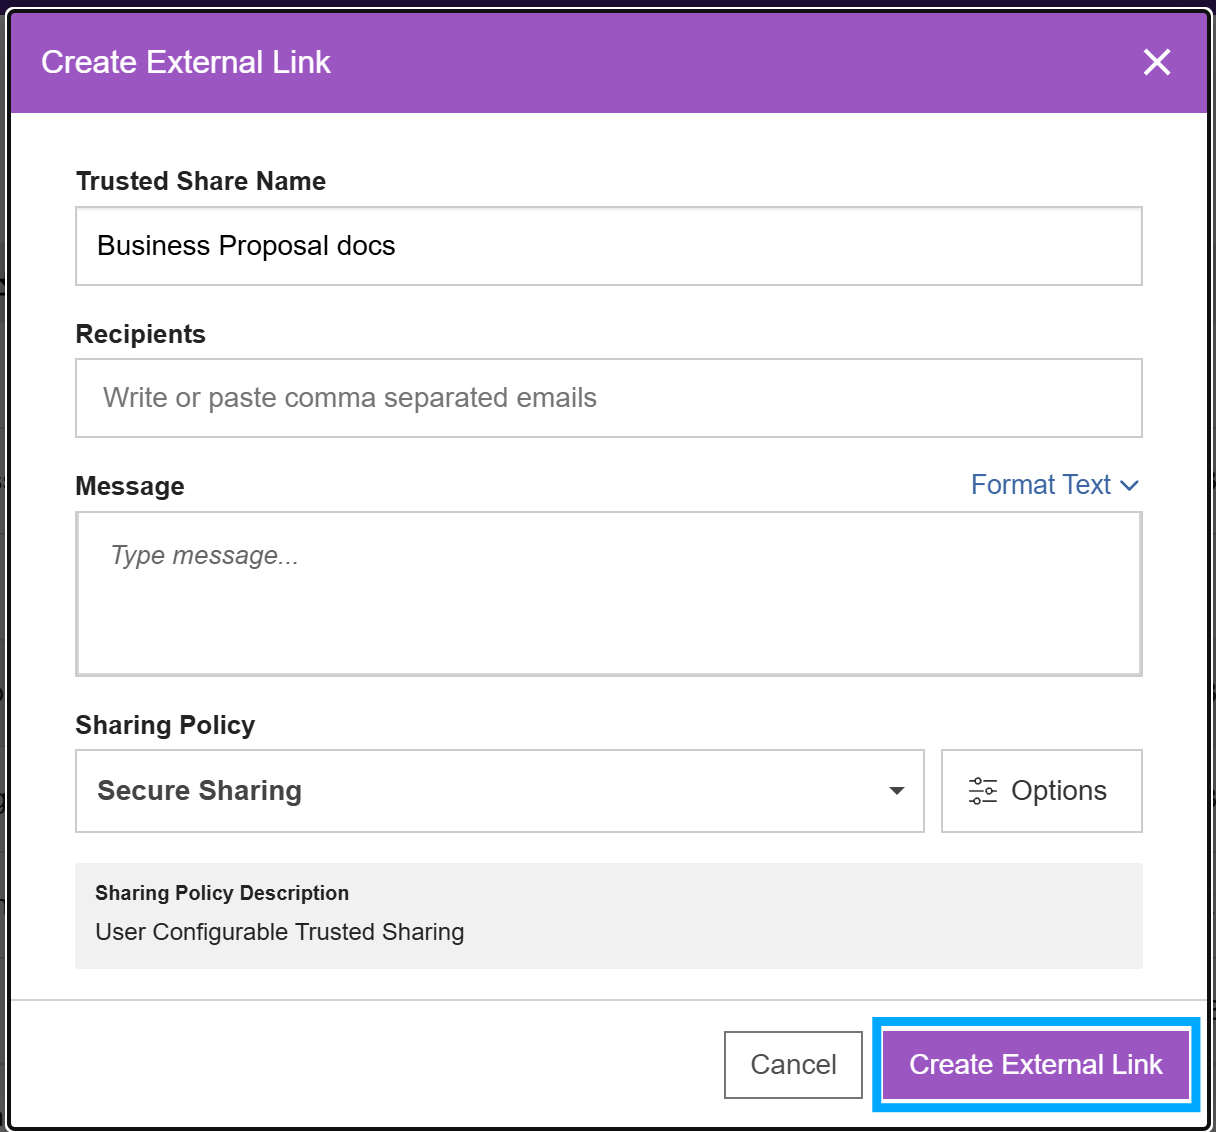
In the 'Create External Link' window, enter a Trusted Share Name.
If you don't know who the recipients will be yet, leave the 'Recipients' field empty — you can create the link without entering any recipients.
Optionally, add a Message for the recipients.
Note:
If you do add recipients here, they won't receive an email invitation. You'll need to send them the link yourself after the External Link is created.
Review the Sharing Policy and Create the Link
Review the 'Sharing Policy' shown for this link. If you are unable to change the sharing policy, it means your organization administrator has enforced a sharing policy.
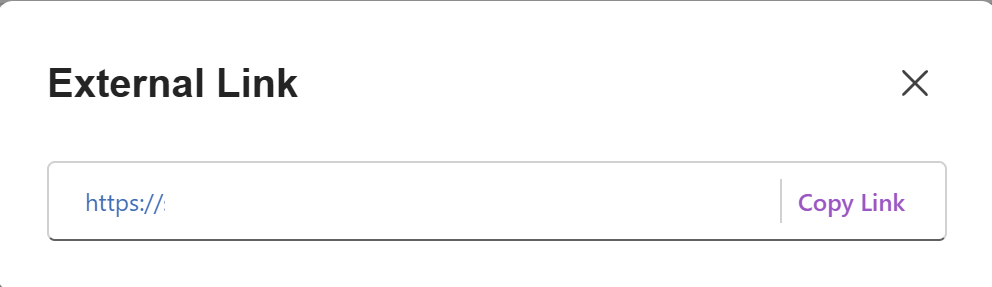
Select 'Create External Link'. eShare creates the Trusted Share and displays the generated link for you to copy and share.
Note:
If you don't add any recipients on an External Link, the Trusted Share is still created. Whether someone who opens the link is added automatically or needs your approval depends on the 'Link auto-approval' setting configured on the applied Sharing Policy.
You can access all your shares through the 'My Shares' section.