This document outlines the steps to install and update the eSHARE Data Classification Add-in in Microsoft 365 Commercial and Government. The following steps will be reviewed:
PREREQUISITES:
The person performing these steps must have an administrator role assignment of Application Administrator and Exchange Administrator, or Global Administrator in the destination M365 tenant.
Install the Data Classification Add-in (Commercial Cloud)
Log in to the Microsoft 365 Admin Center (https://admin.cloud.microsoft) as an administrative user.
Go to 'Settings' > 'Integrated apps'.
Within 'Integrated apps', select 'Upload custom apps' to deploy the add-in.
.png?sv=2026-02-06&spr=https&st=2026-11-18T20%3A16%3A56Z&se=2026-11-18T20%3A28%3A56Z&sr=b&sp=r&sig=vJkMtlFbetFpyloqXdjsEAIyBCR3pK2N2iMRGrdP9iE%3D)
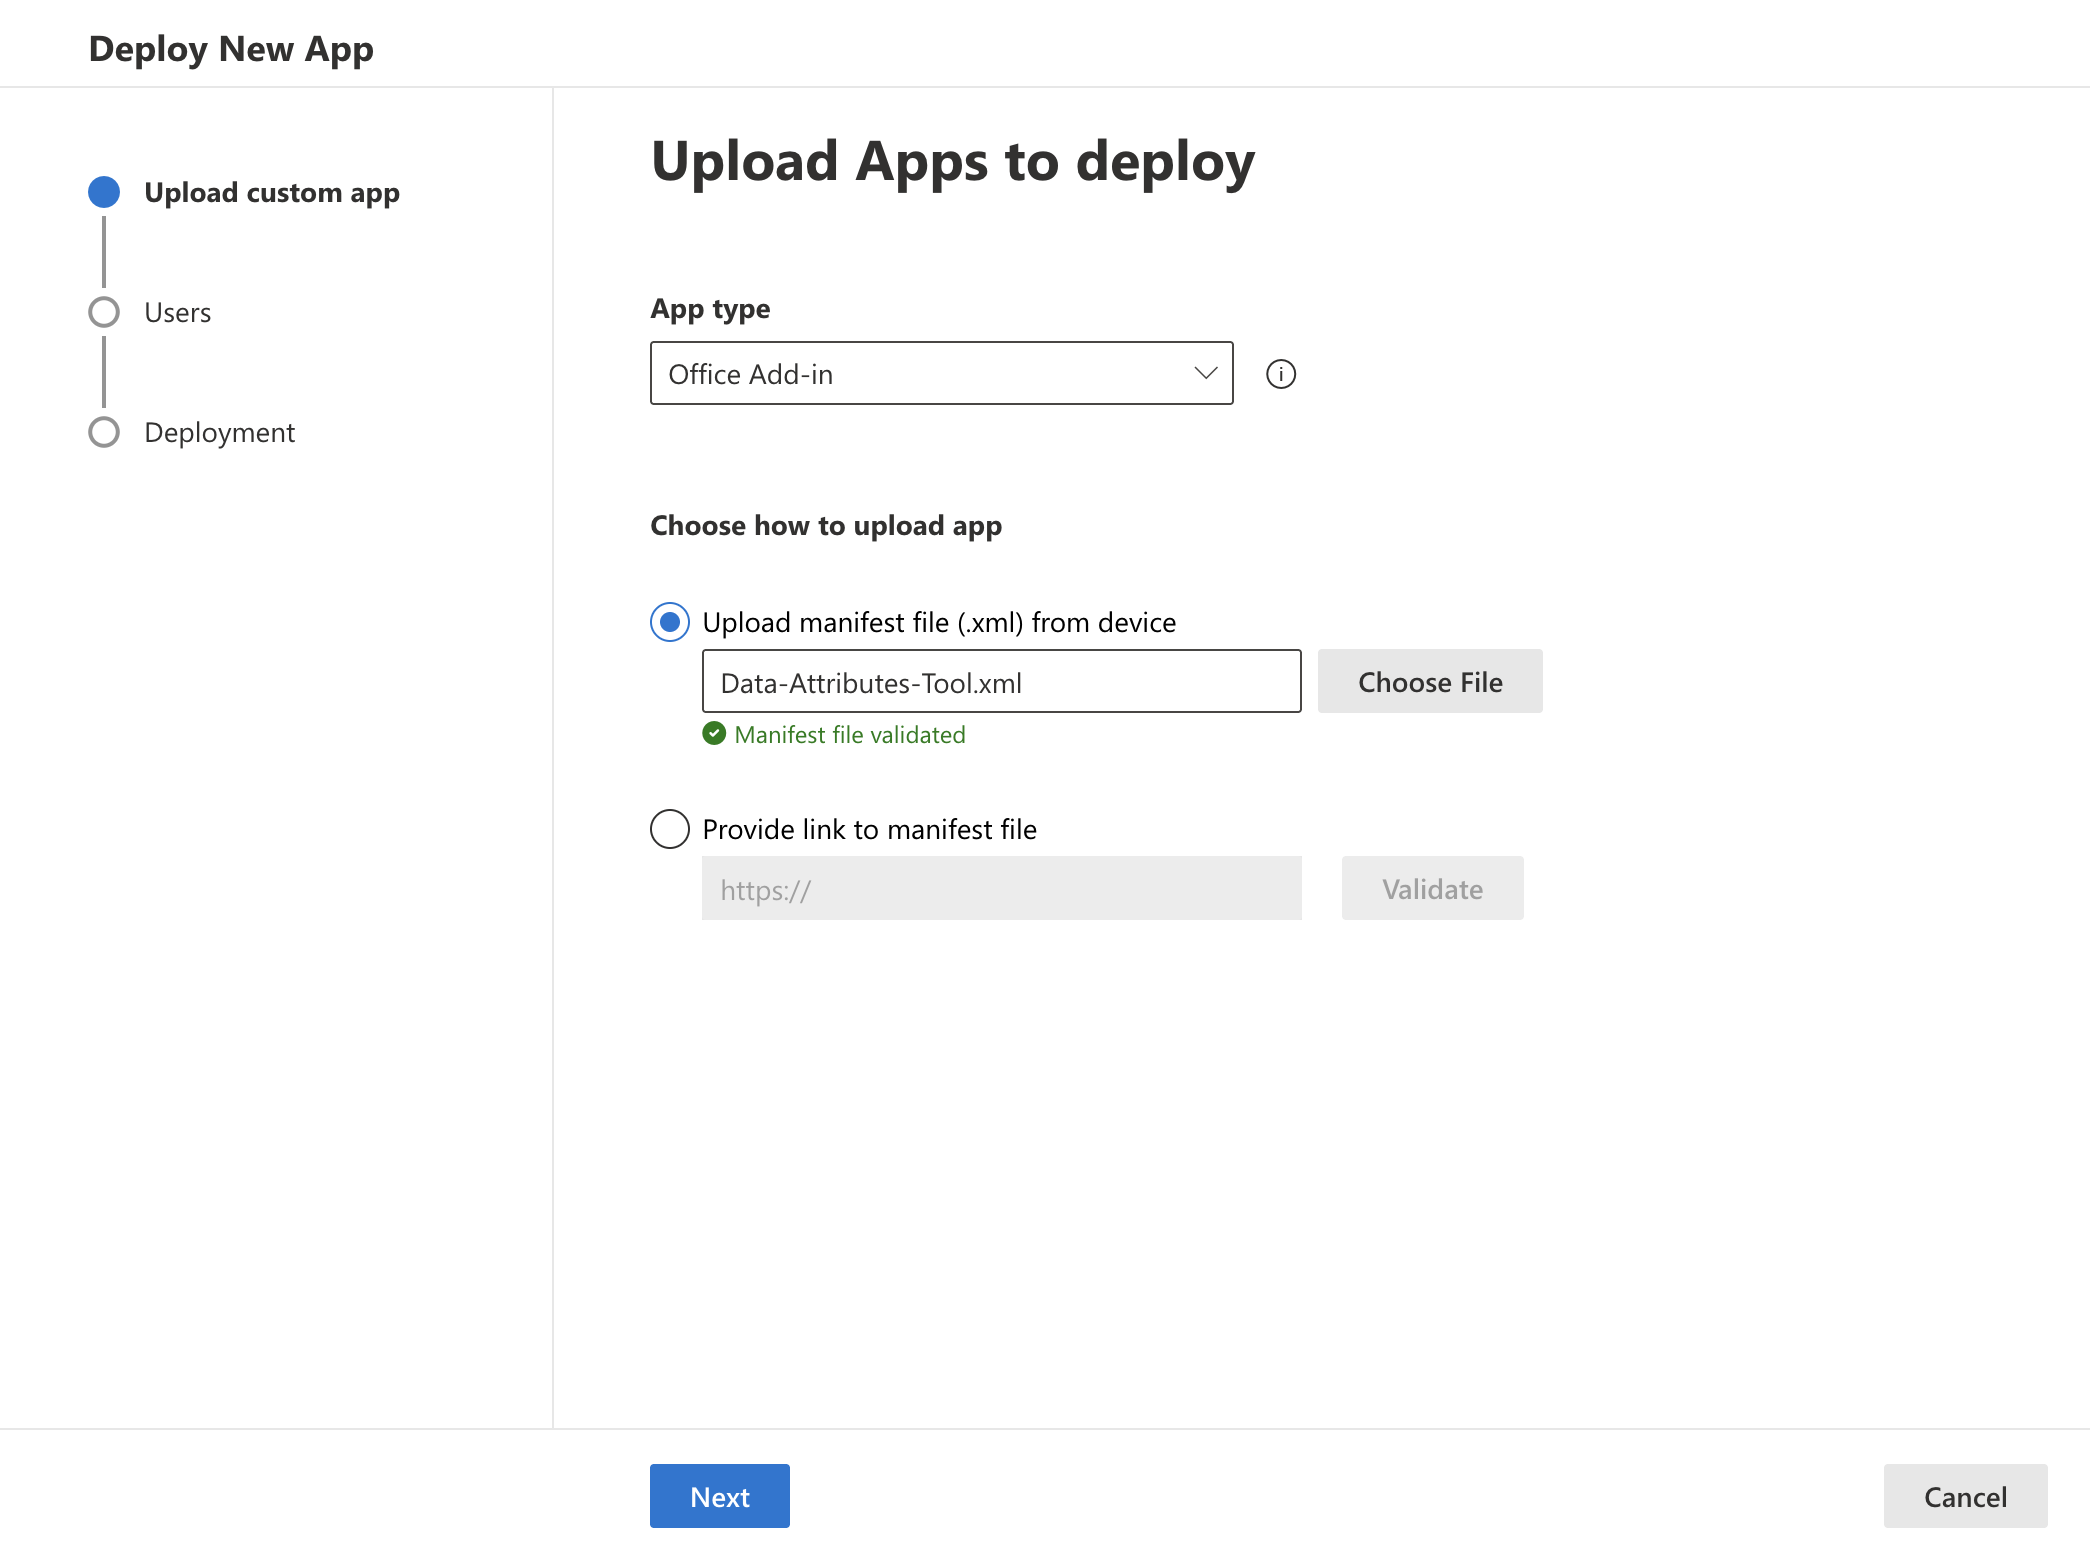
Next, select the app type 'Office Add-in'.
Select 'Upload manifest file (.xml) from device' and upload the XML manifest file provided by your eSHARE CSM, then select 'Next'.
Note:
Please contact your eSHARE Customer Success Manager for the latest Commercial or Government Cloud M365 Office Add-in .xml Manifest file.
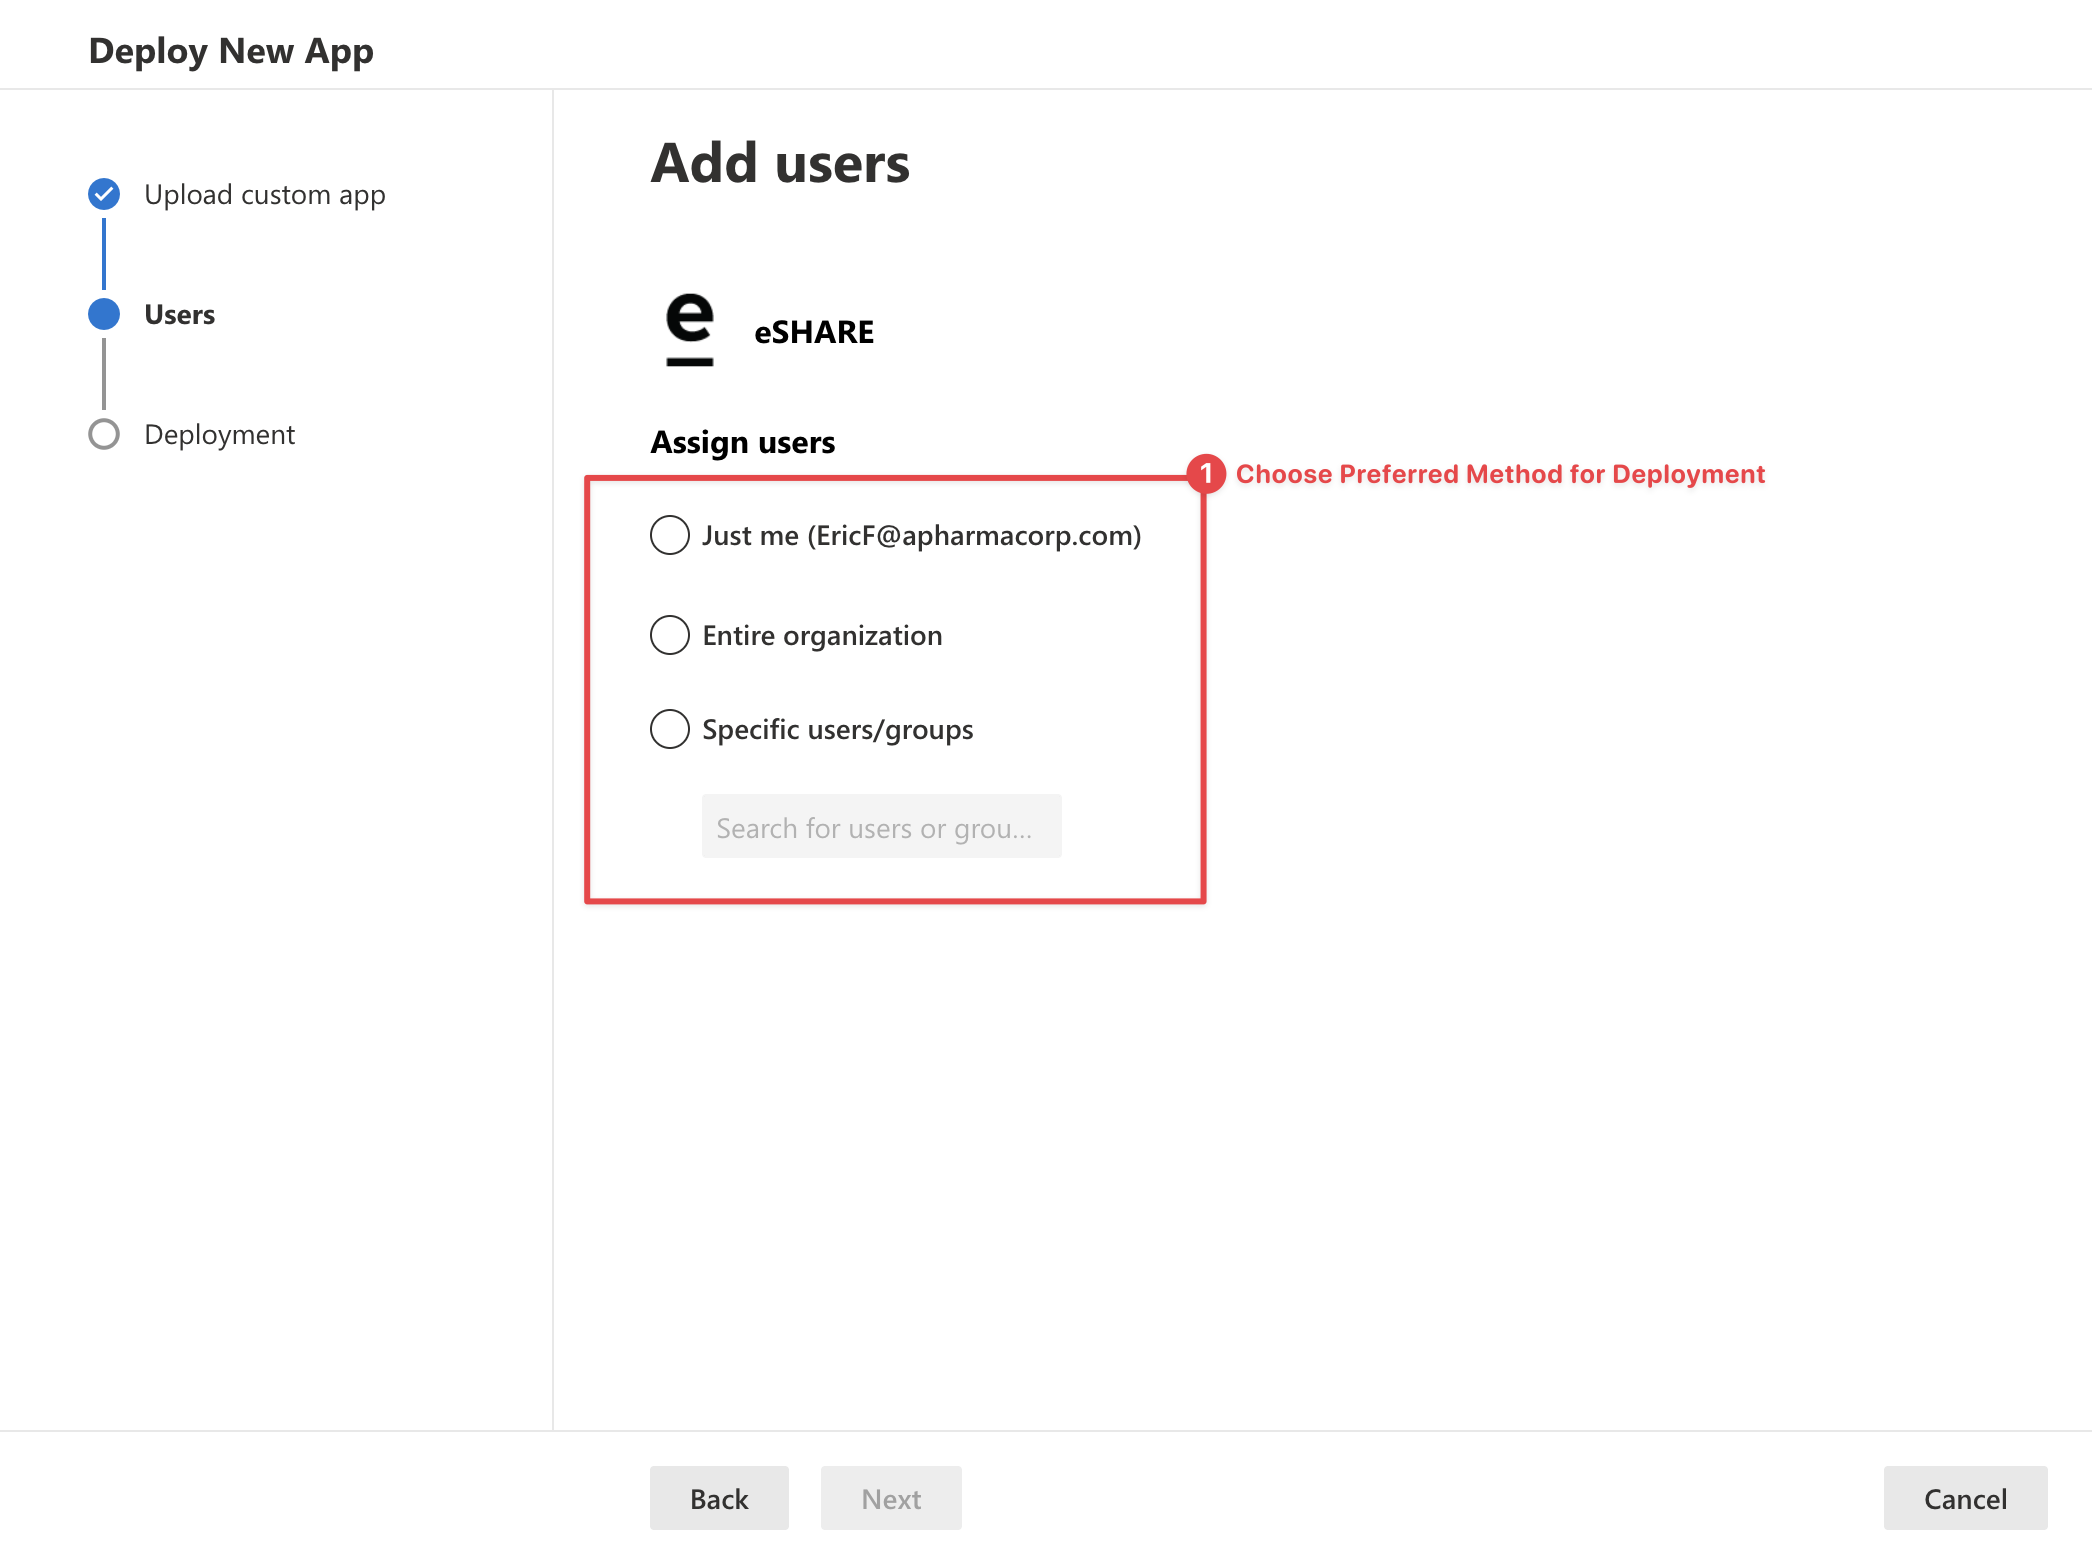
Determine the scope of who the application should be deployed to and select 'Next'.
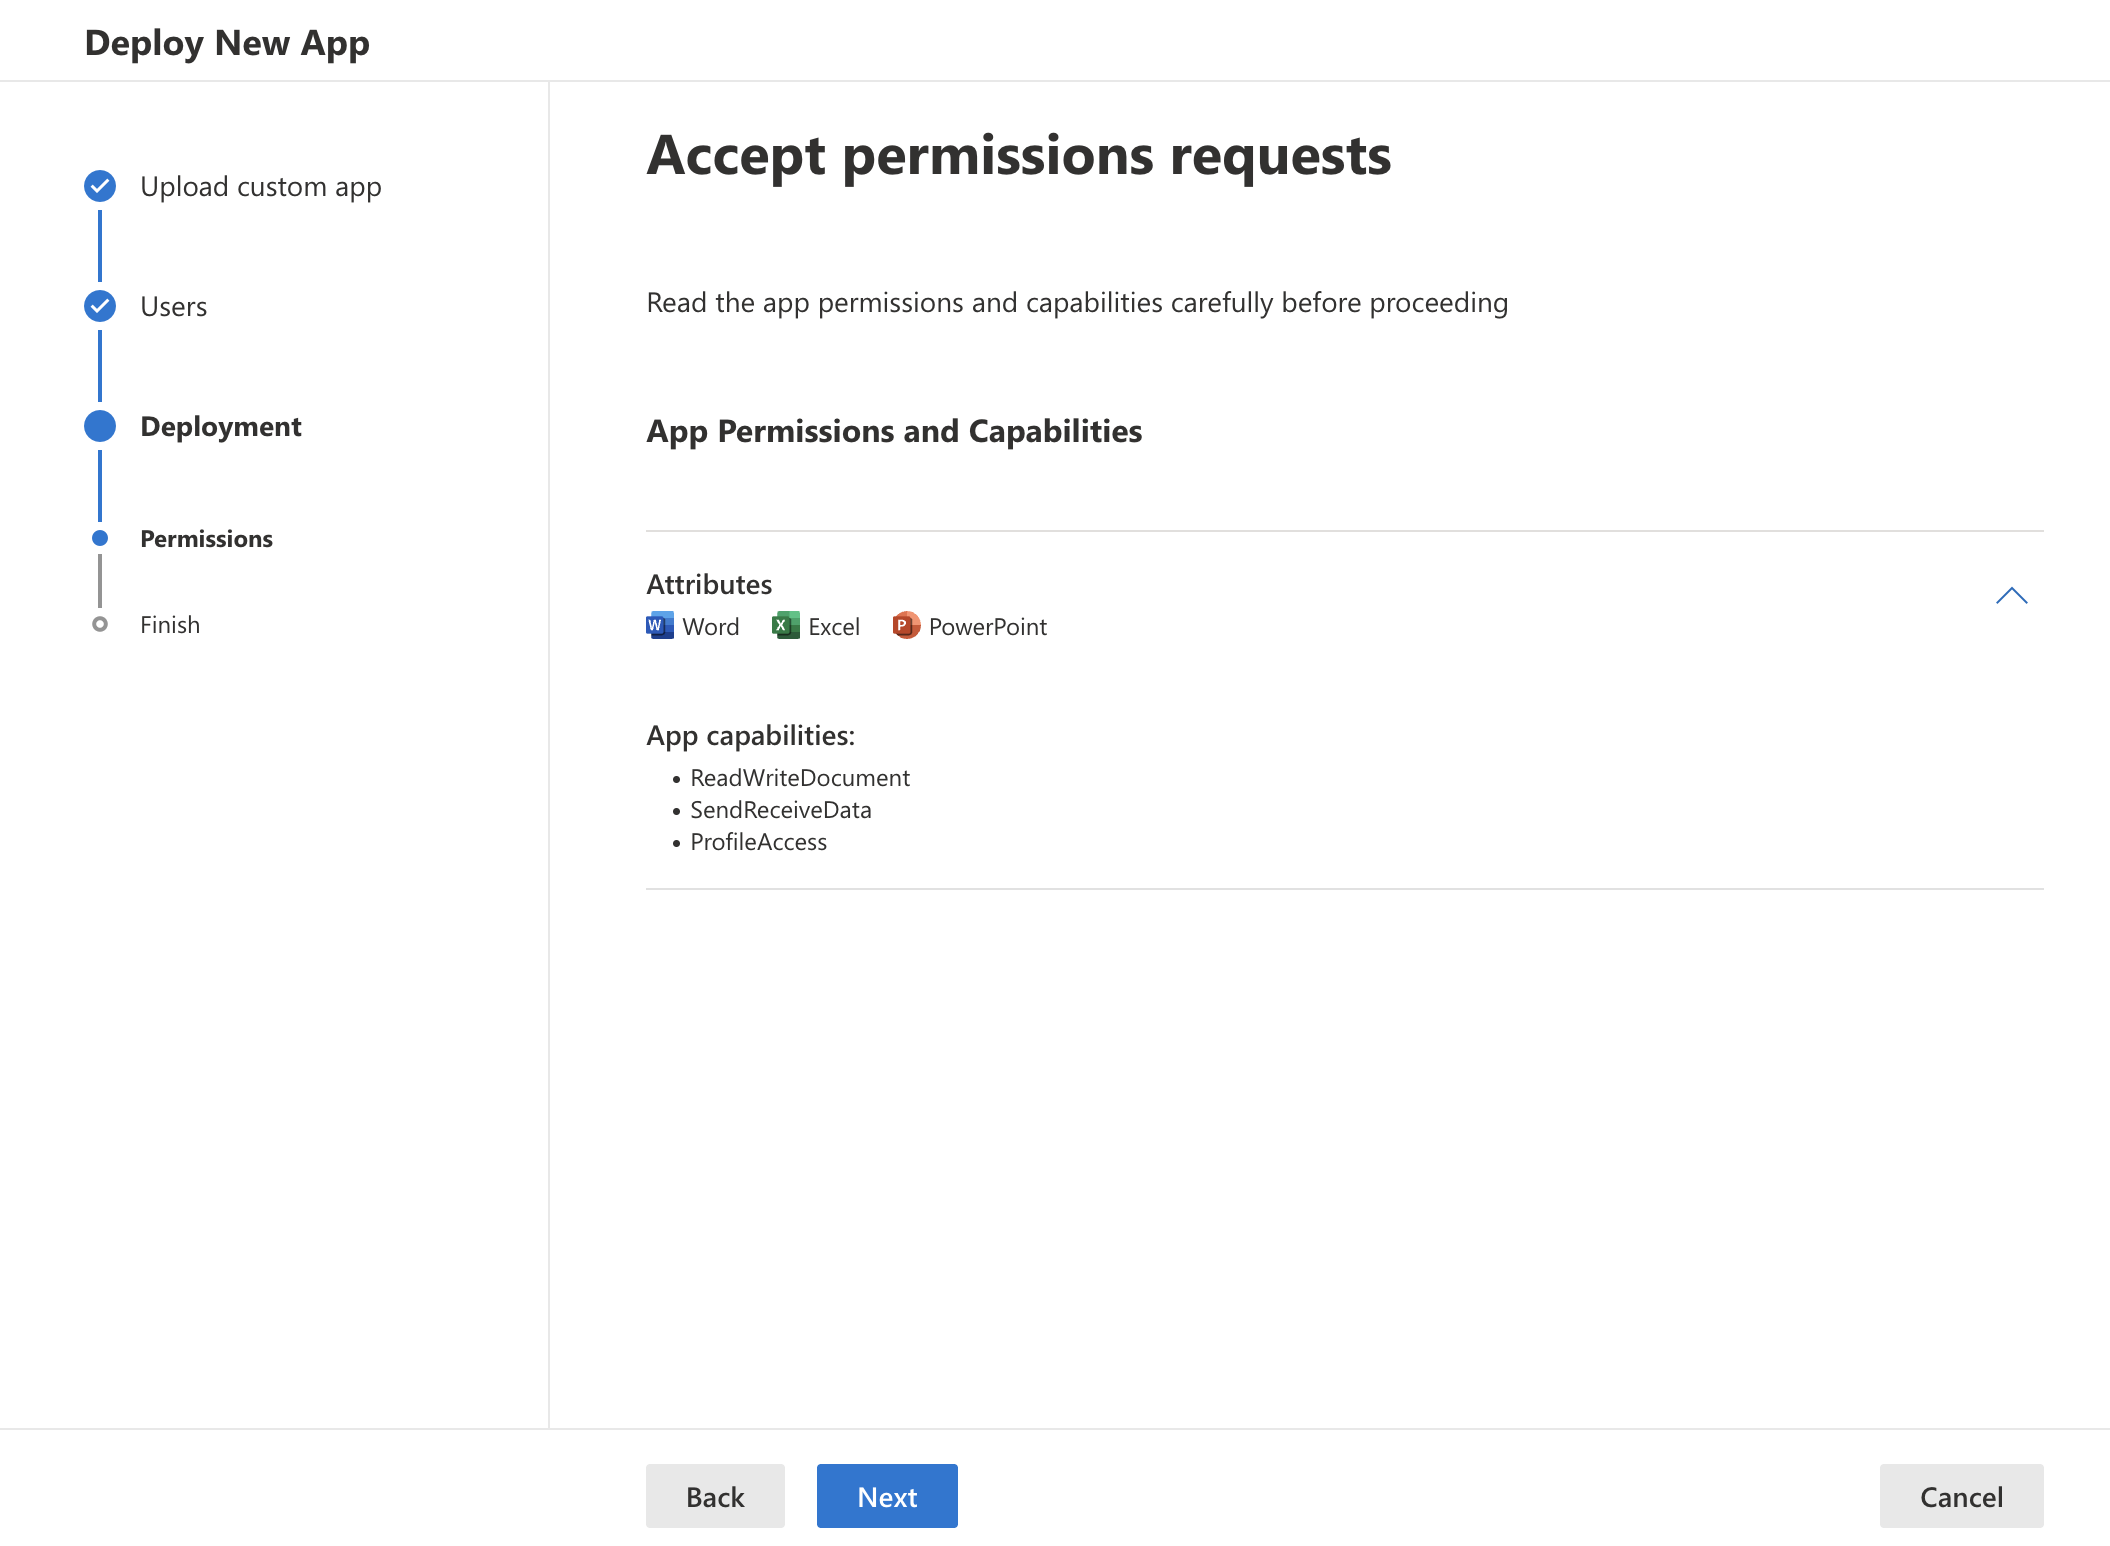
Accept the permissions requests, then select 'Next'.
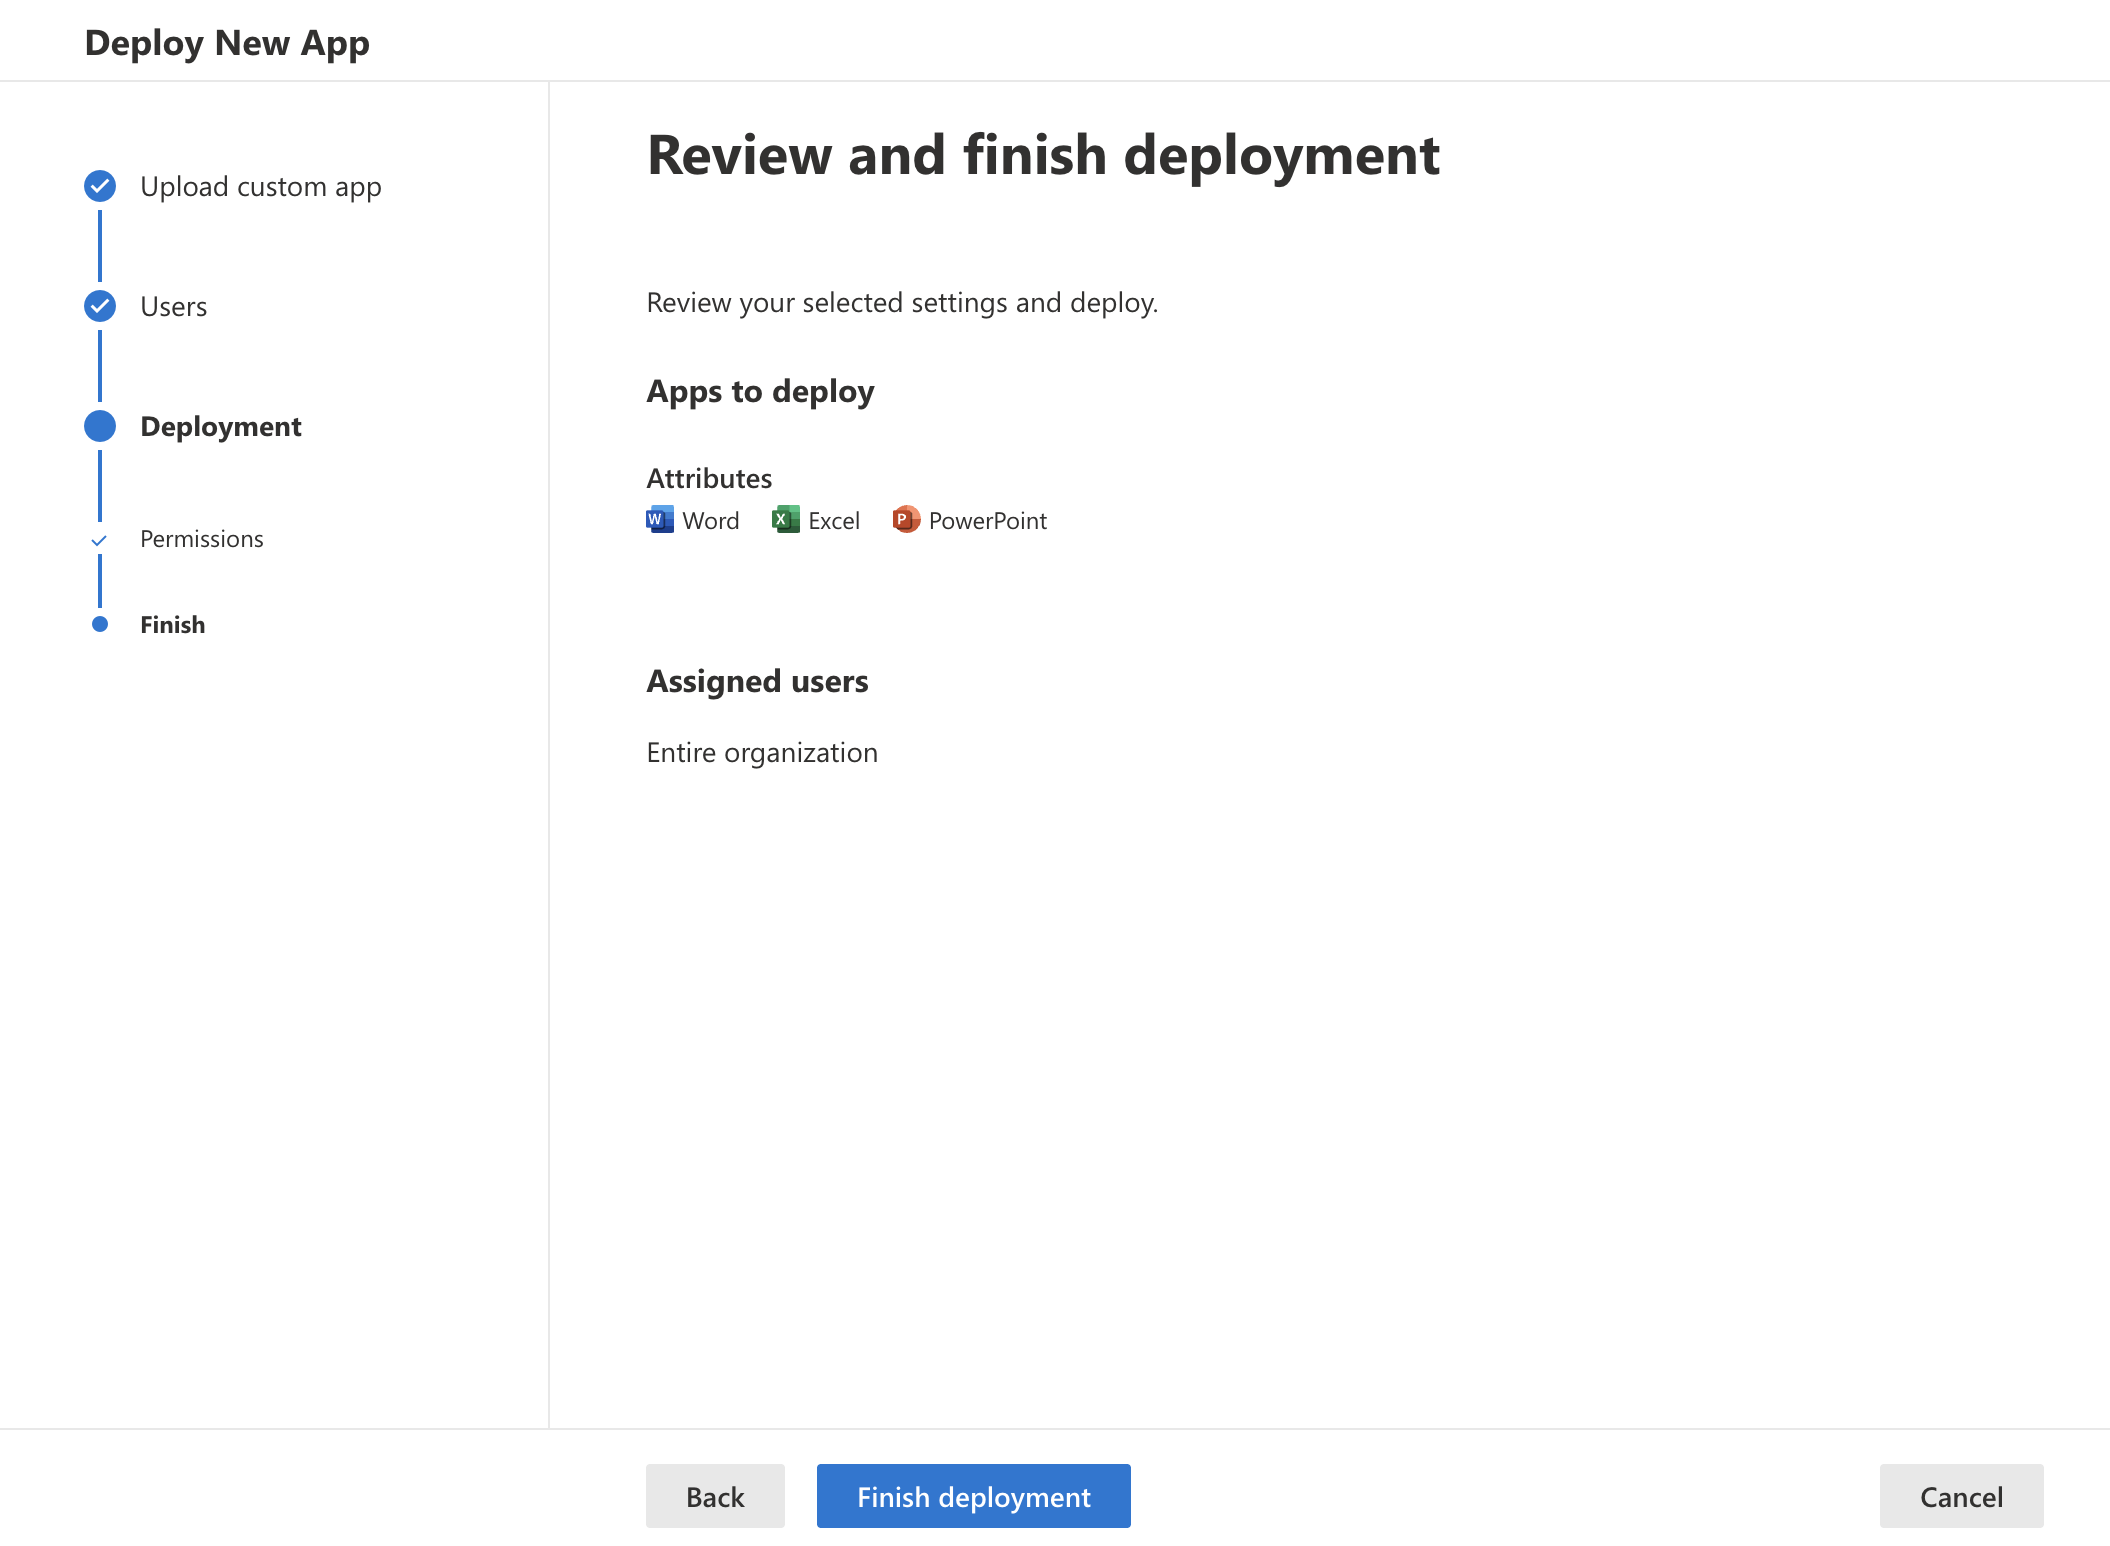
Review the selected settings, then select the 'Finish deployment' button to publish the add-in to all users.
Note:
It can take up to 72 hours for the Add-in to appear in the Office Application clients for users.
Install the Data Classification Add-in (Government Cloud)
Log in to the Microsoft 365 Admin Center (https://portal.office365.us/adminportal) as an administrative user.
Go to 'Settings' > 'Add-ins'.
Within 'Add-ins', select 'Deploy Add-in' to deploy the add-in.
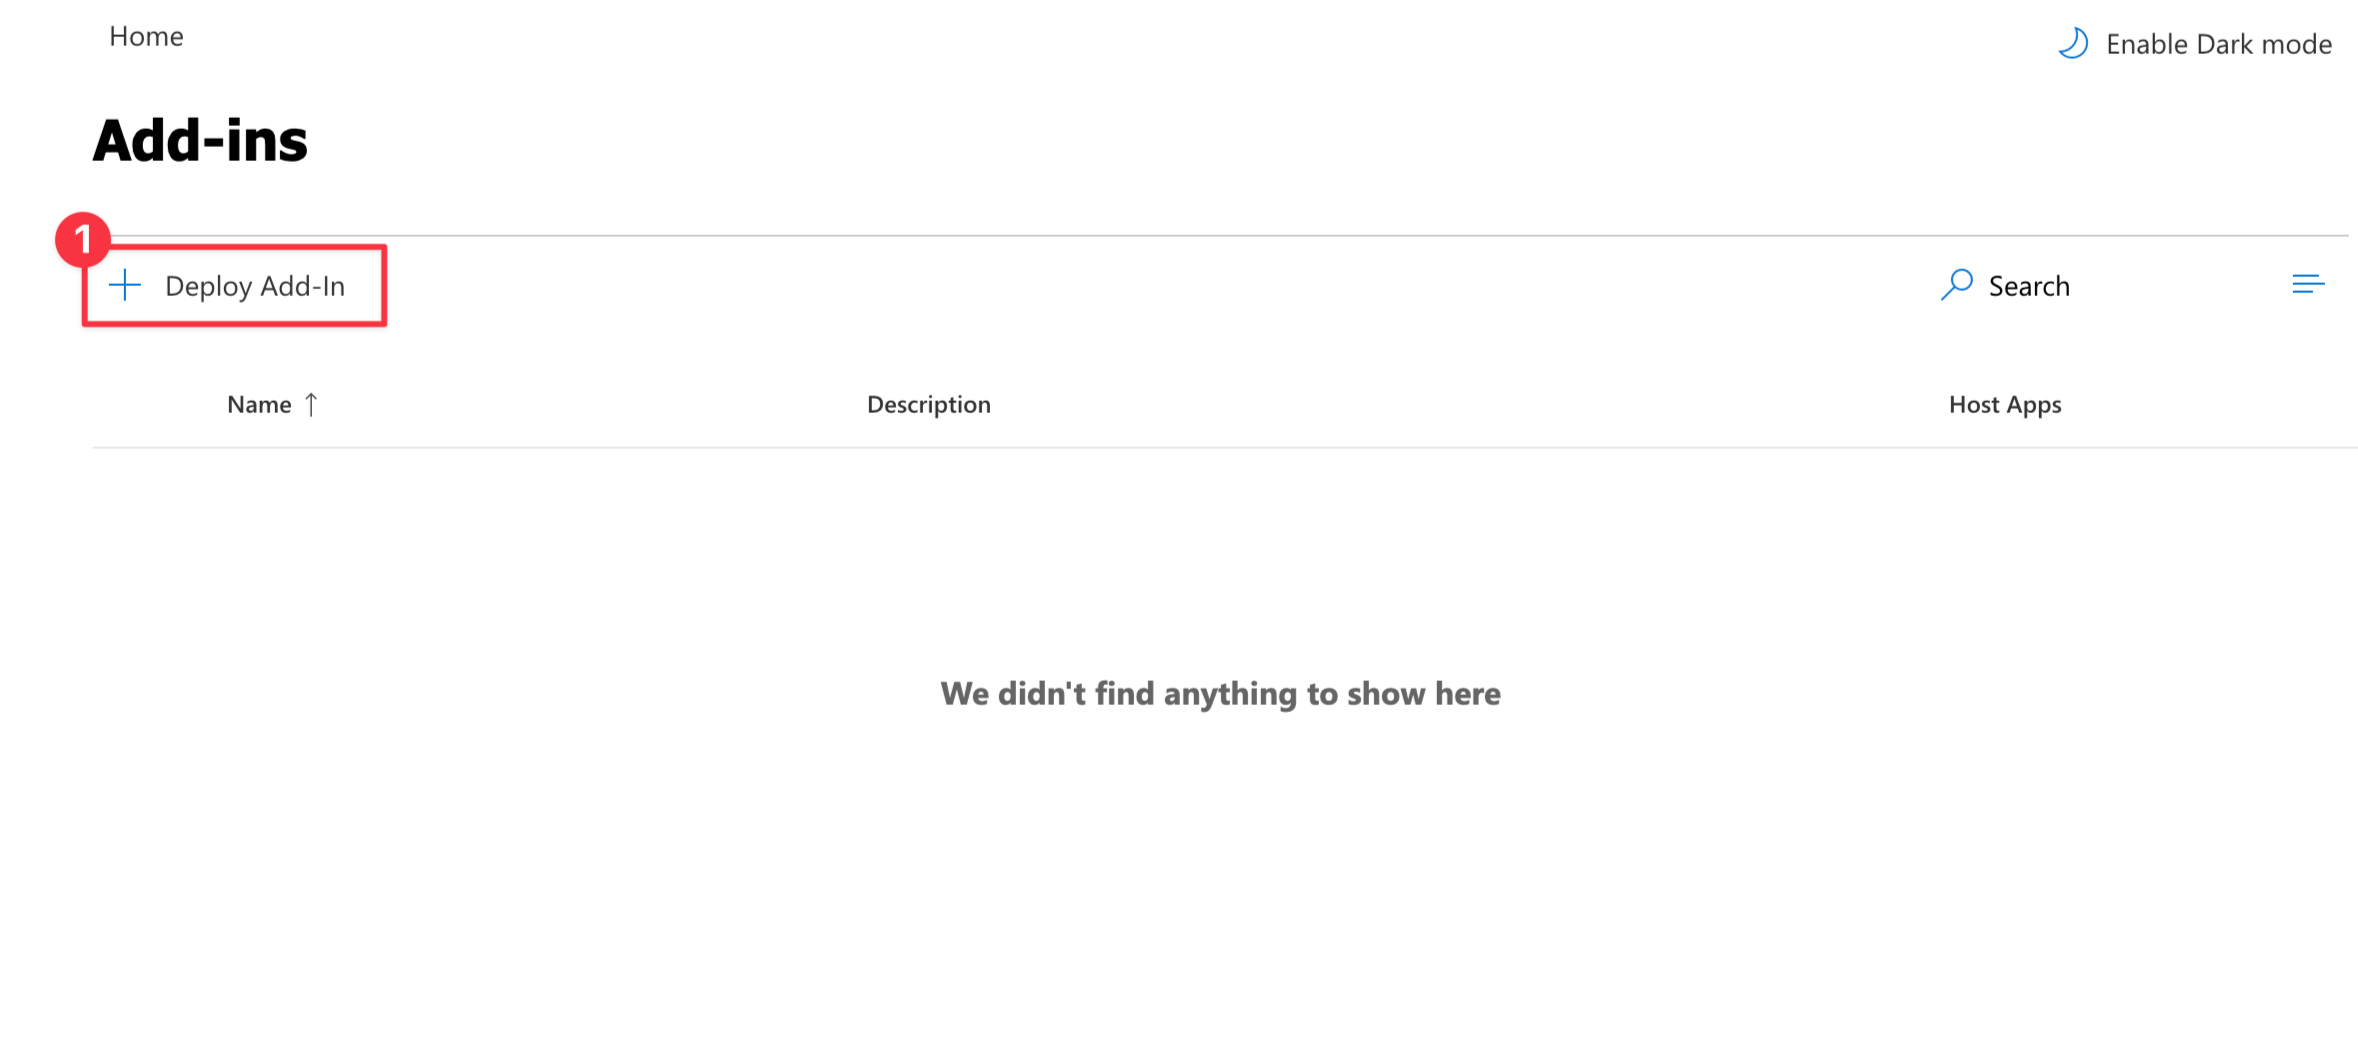
Next, select the 'Upload custom apps' option.
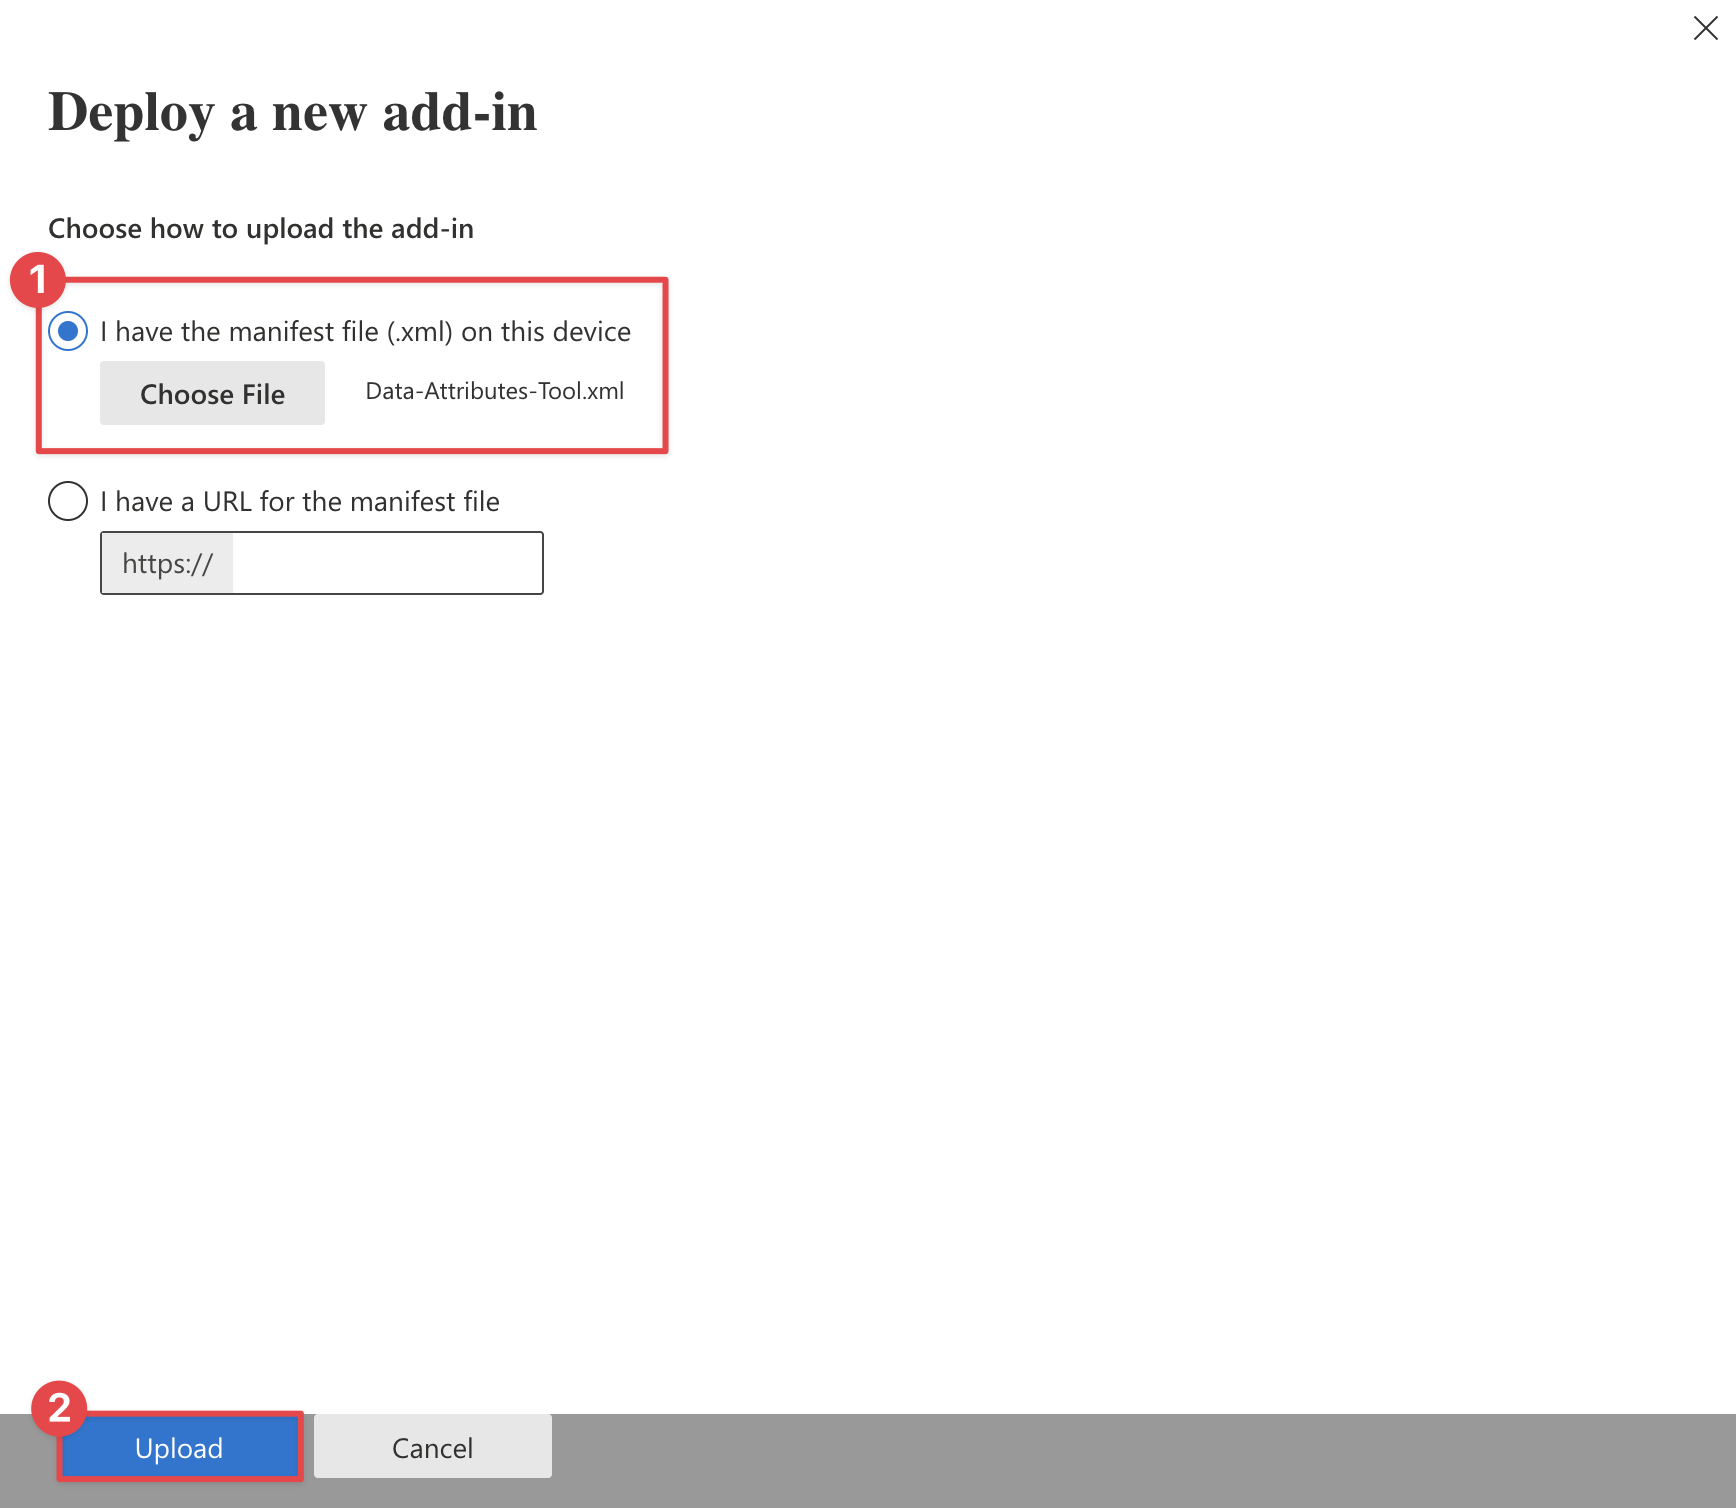
Select 'I have the manifest file (.xml) on this device' and upload the XML manifest file provided by your eSHARE CSM, then select 'Upload'.
Note:
Please contact your eSHARE Customer Success Manager for the latest Commercial or Government Cloud M365 Office Add-in .xml Manifest file.
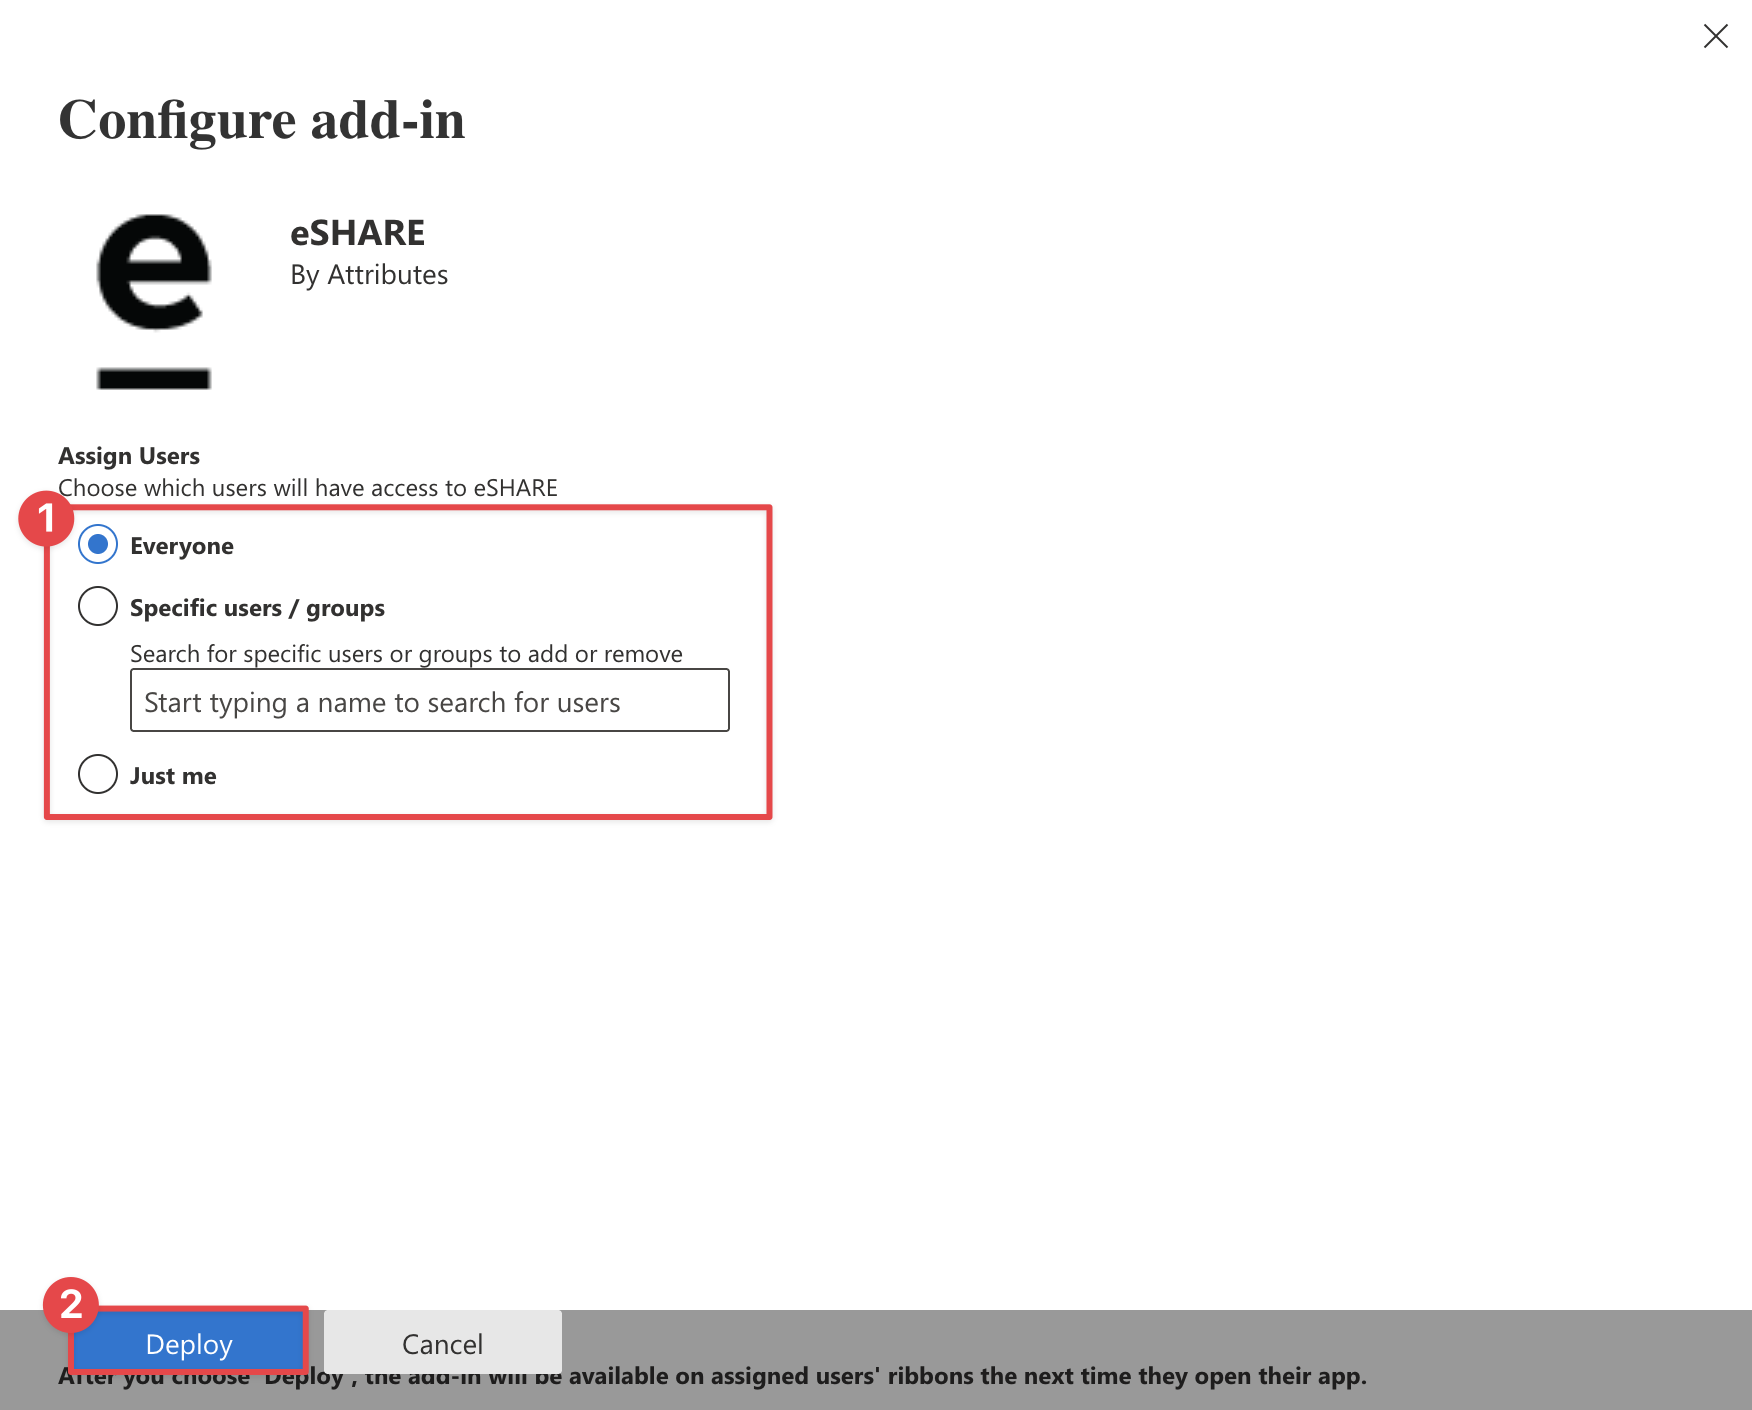
Determine the scope of who the application should be deployed to, then select 'Deploy'.
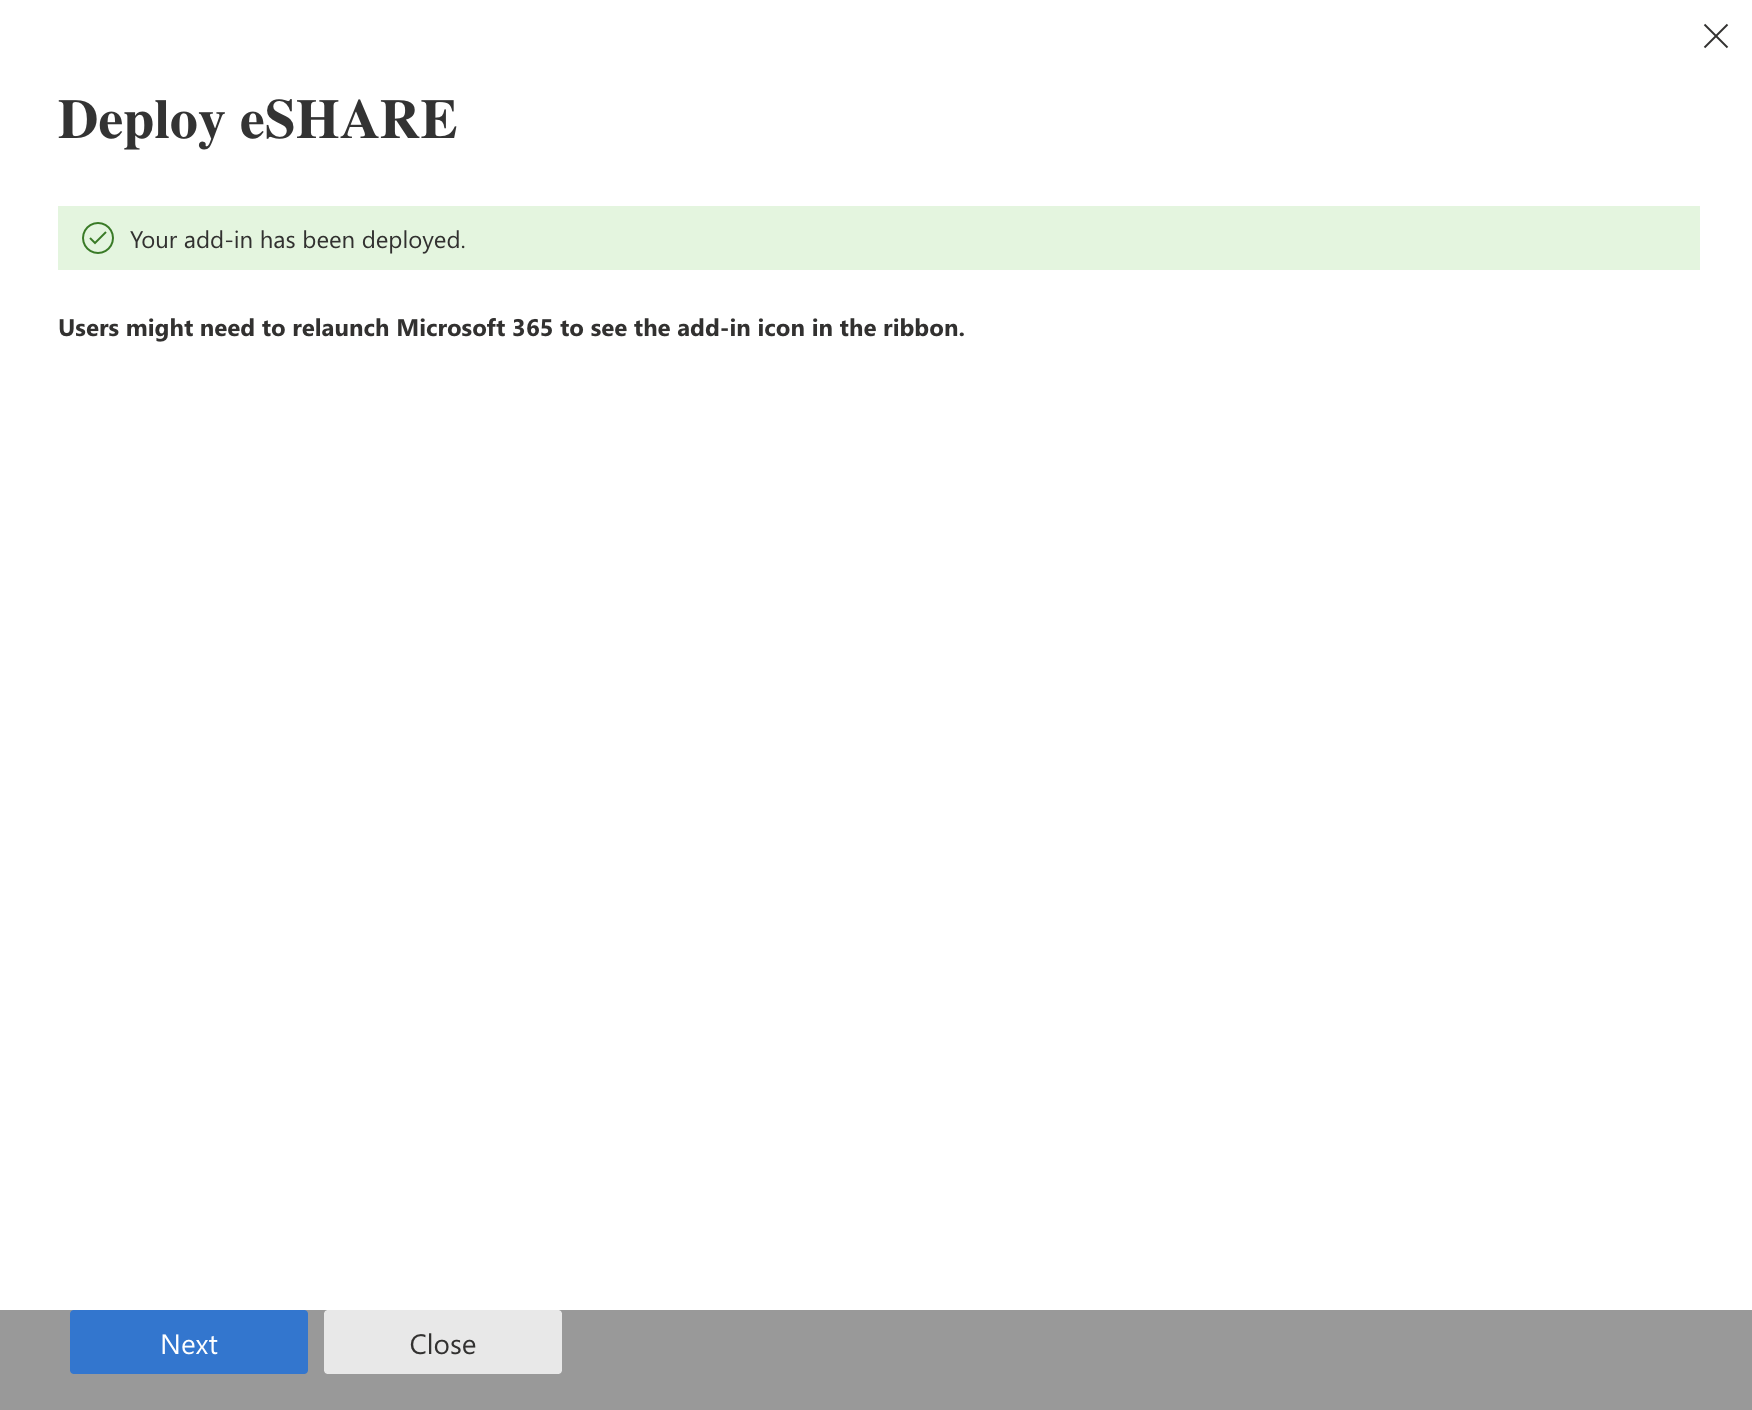
Confirm the add-in was successfully deployed, then select 'Next'.
Note:
It can take up to 72 hours for the Add-in to appear in the Office Application clients for users.
Update the Data Classification Add-in (Commercial Cloud)
Log in to the Microsoft 365 Admin Center (https://admin.cloud.microsoft) as an administrative user.
Go to 'Settings' > 'Integrated apps'.
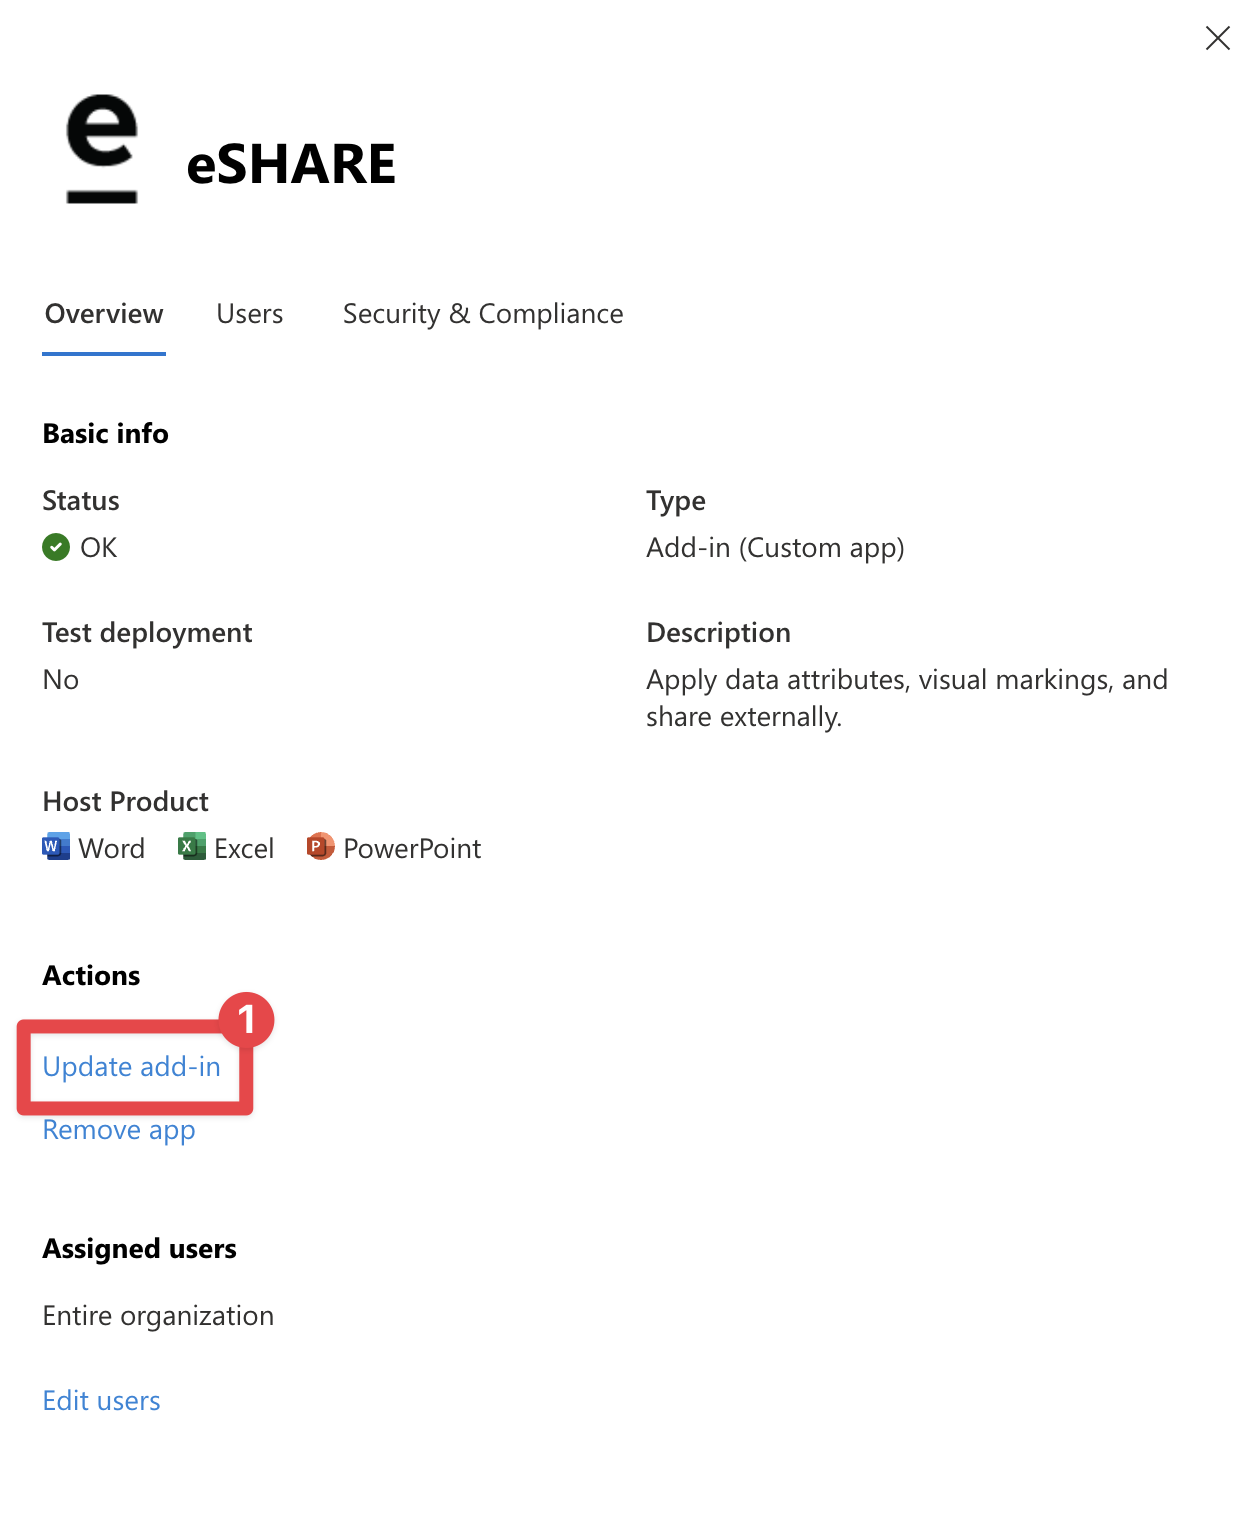
Within 'Integrated apps', select the 'eSHARE' add-in to open the details.
In the details panel, select the 'Update add-in' option under the 'Actions' category.
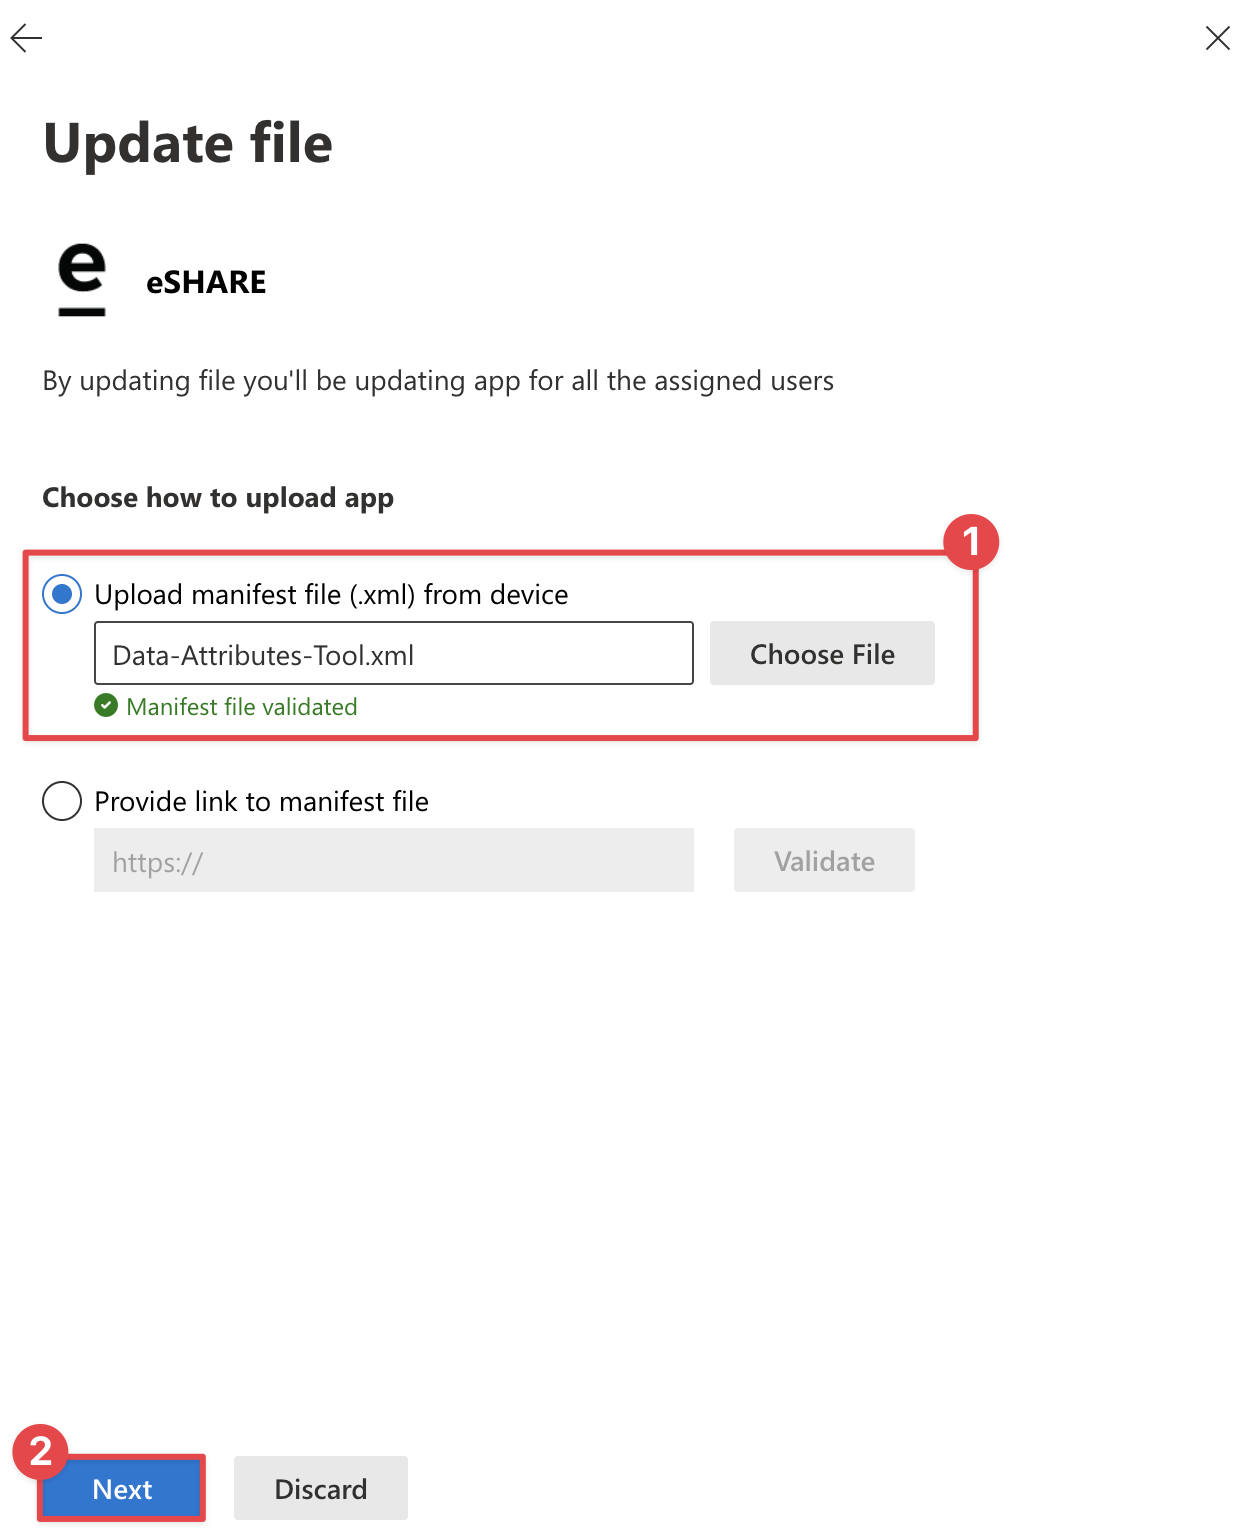
Upload the new manifest file and select 'Next' to proceed with updating.
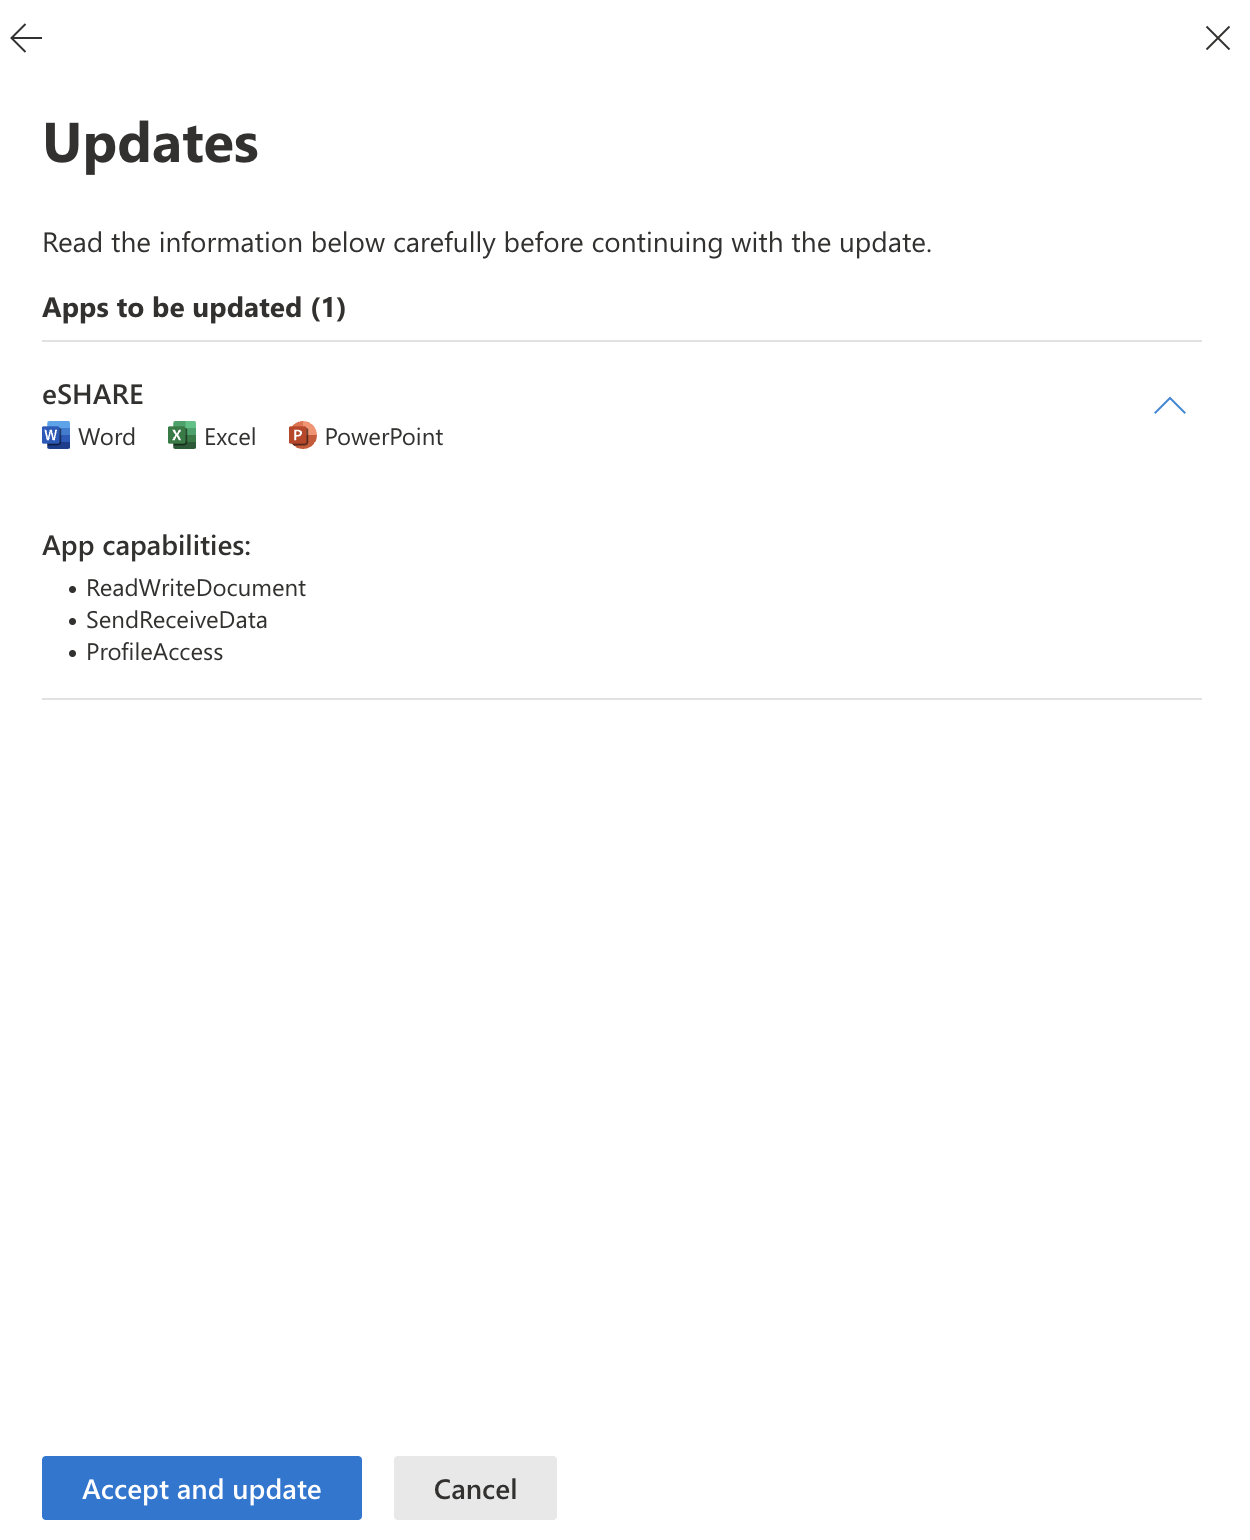
Select the 'Accept and update' button to complete the Add-in update.
Update the Data Classification Add-in (Government Cloud)
Log in to the Microsoft 365 Admin Center (https://portal.office365.us/adminportal) as an administrative user.
Go to 'Settings' > 'Add-ins'.
Within 'Add-ins', select the 'eSHARE' add-in to open the details.
On the details panel, select the 'Update add-in' option, then select the new manifest file to upload.
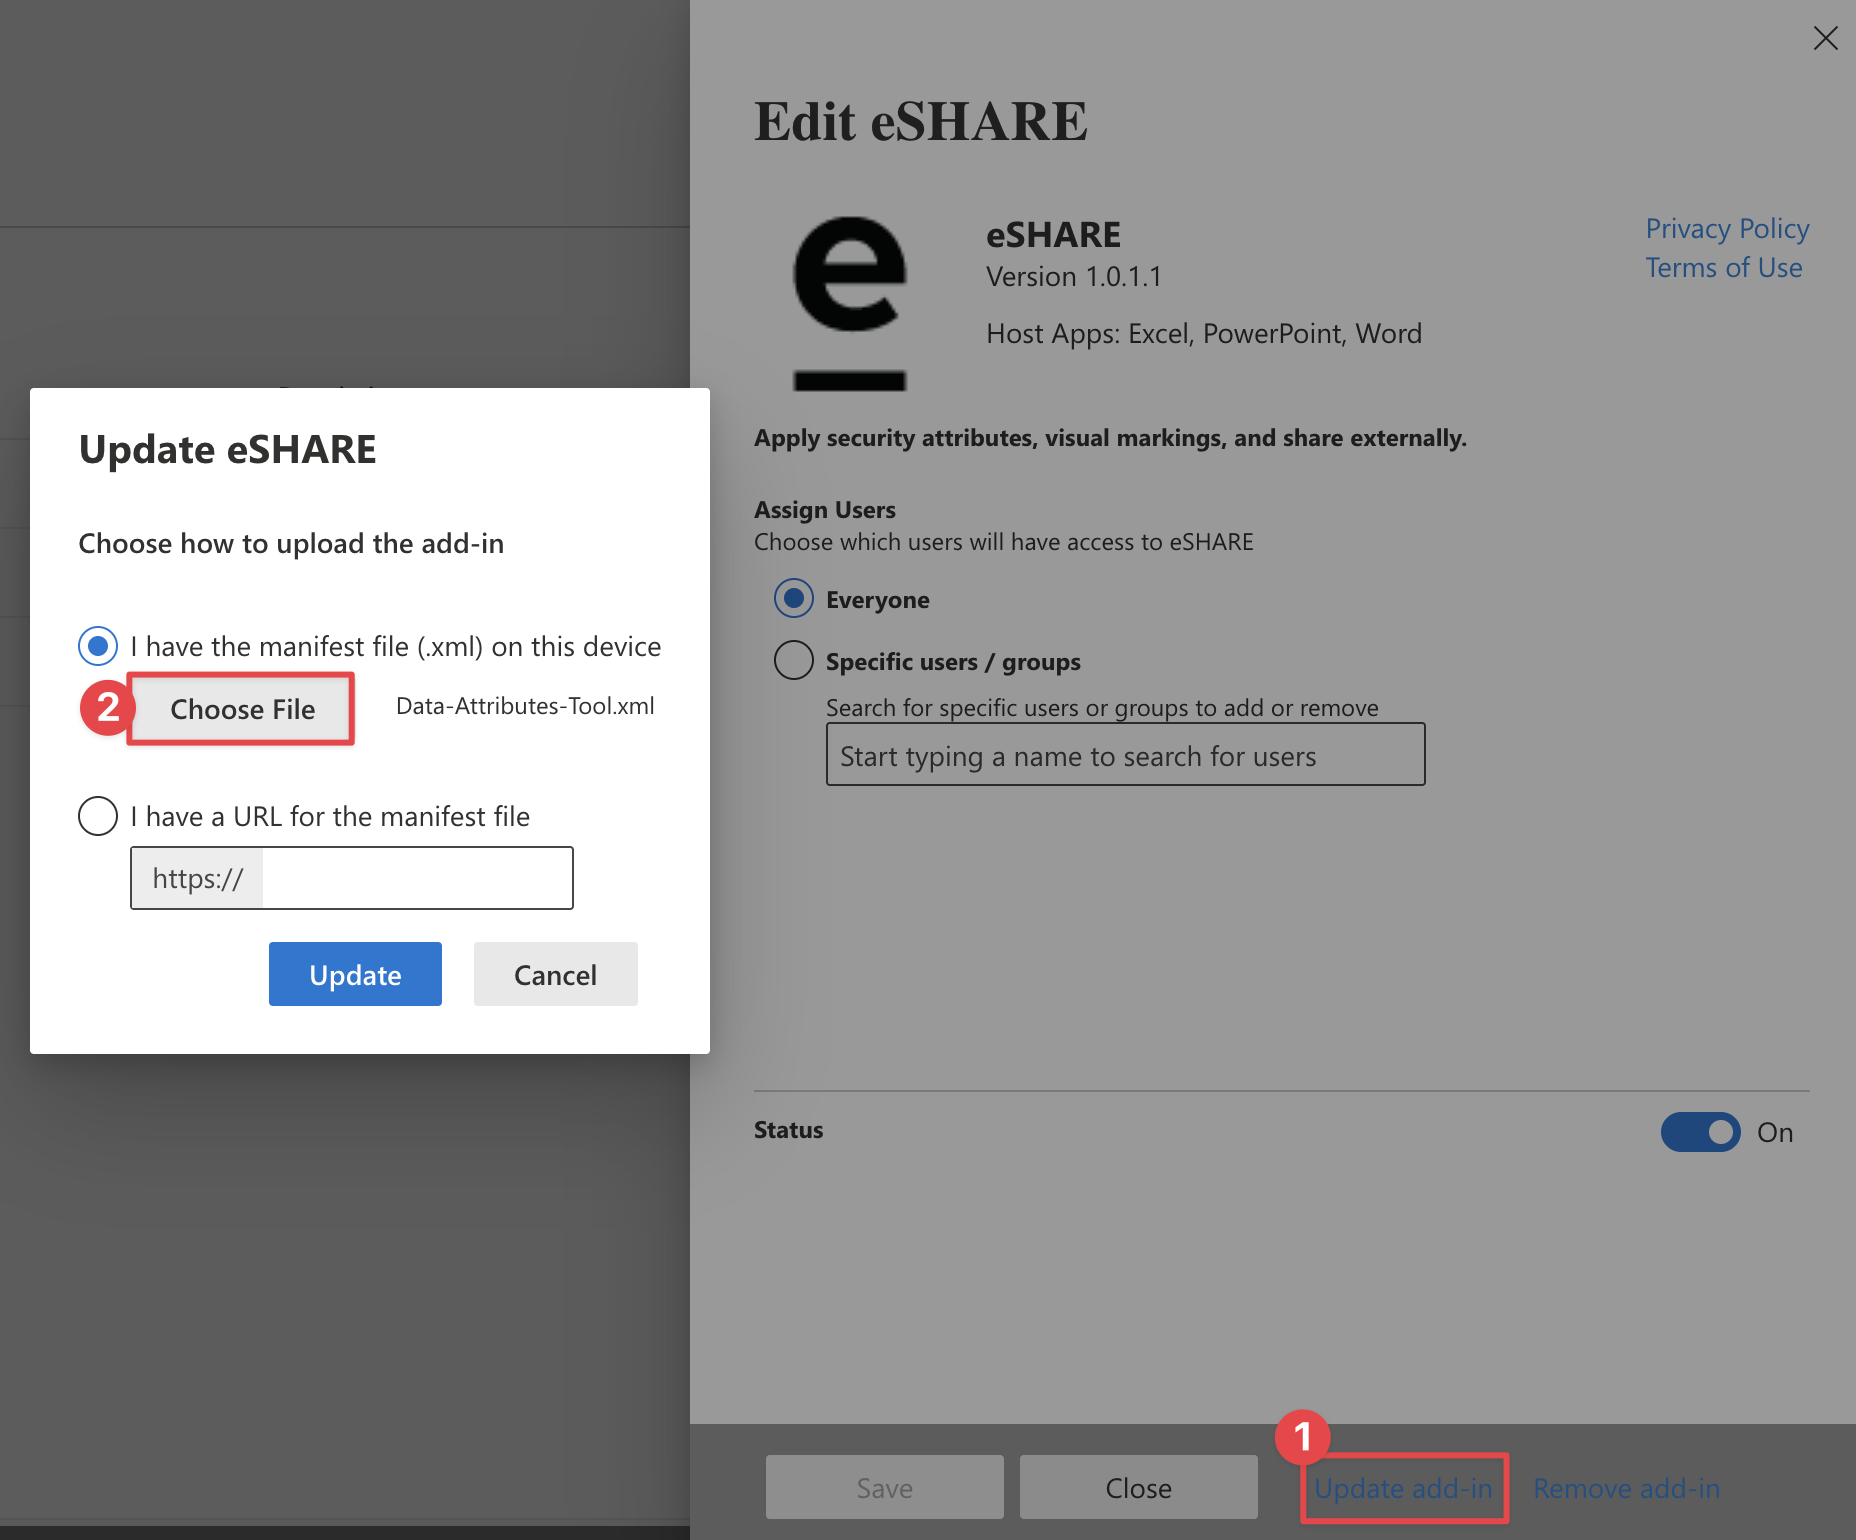
After it is uploaded, a confirmation prompt will appear indicating the app has been updated accordingly.
.png?sv=2026-02-06&spr=https&st=2026-11-18T20%3A16%3A56Z&se=2026-11-18T20%3A28%3A56Z&sr=b&sp=r&sig=Z9zdiAPF8HqTfpNsdHCIufBAxTh96lHhc1u%2BOz%2B79Cc%3D)